The full step-by-step guide to restaking on EigenLayer with stakefish
stakefish is excited to announce support for restaking with EigenLayer. Always at the forefront of the latest innovations in crypto, stakefish is excited to expand our staking offerings and options to provide the best service for our stakers.
Table of Contents
- What is EigenLayer?
- How to restake with stakefish
- Withdrawals from EigenLayer
- Try on Holesky testnet
- EigenPod Upgrade Guide
What is EigenLayer?
EigenLayer is a protocol built on the Ethereum network that introduces the concept of restaking, a new element in cryptoeconomic security. This innovative approach allows for the rehypothecation of Ethereum (ETH) within the consensus layer, thereby enhancing the utility of staked assets.
Users engaging in Ethereum staking, either directly with ETH or through various liquid staking tokens (such as stETH, rETH, cbETH, and LsETH), have the opportunity to participate in EigenLayer's smart contracts. By opting to restake their assets, users can amplify cryptoeconomic security beyond Ethereum itself, extending it to a multitude of other applications on the network.
This process not only broadens the security landscape but also opens avenues for users to reap additional rewards. EigenLayer's distinctive capability lies in its aggregation and extension of cryptoeconomic security through restaking, simultaneously fostering the validation of emerging applications built atop the Ethereum platform.
Learn more about EigenLayer by visiting their website.
How to restake with stakefish
You can restake your ETH with stakefish via your Ethereum staking dashboard. Our non-custodial and permissionless Ethereum staking dApp supports customizing validator withdrawal addresses to enable native staking with your EigenPod.
We have prepared a step-by-step guide to help walk you through the process of setting up an EigenPod, depositing ETH, claiming rewards, and handling partial and full withdrawals.
1. Stake ETH using EigenLayer staking
Step 1: Navigate to stake.fish and click “Dashboard” in the upper right corner to begin staking.
Step 2: From the dashboard page, click “Stake Now.”
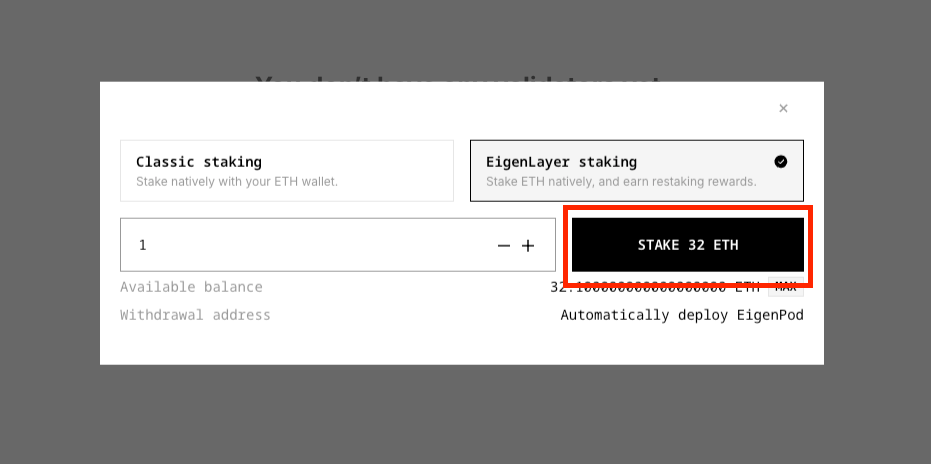
Step 3: Our staking option will appear in a pop-up. Select "EigenLayer staking" and connect to a wallet.
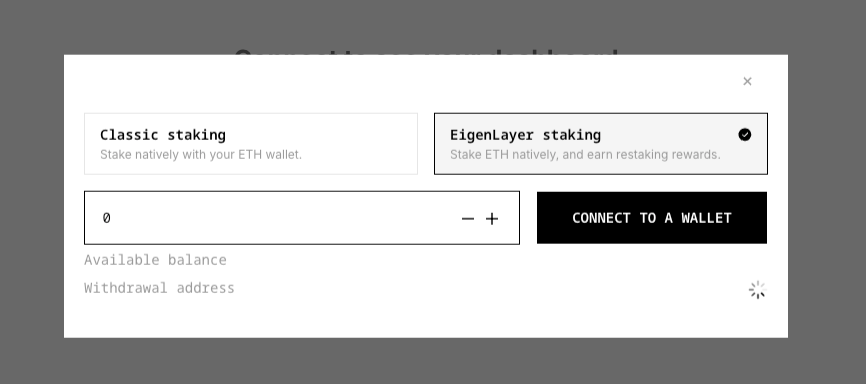
Step 4: Once your wallet is connected, your EigenPod address will automatically be detected. If you do not have an EigenPod address stakefish will automatically create one.
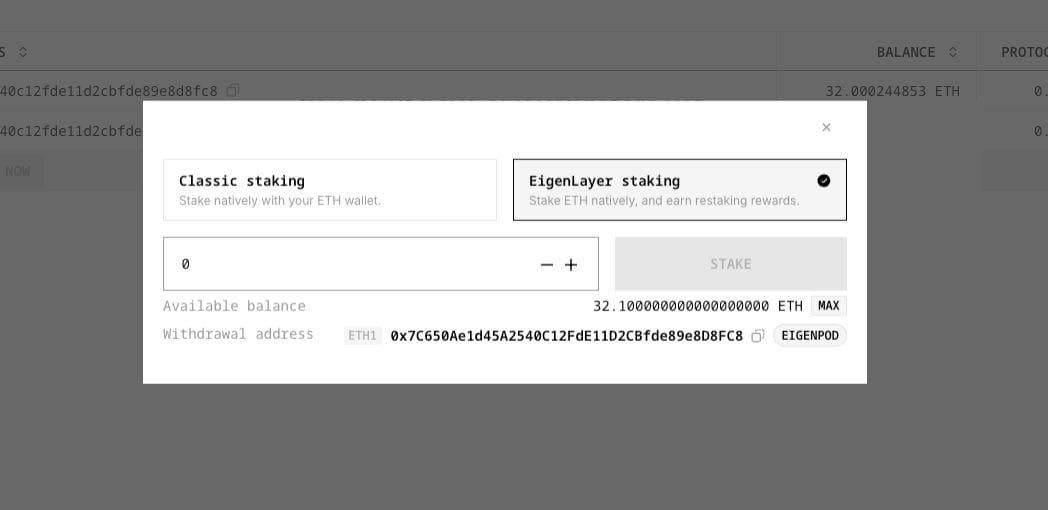
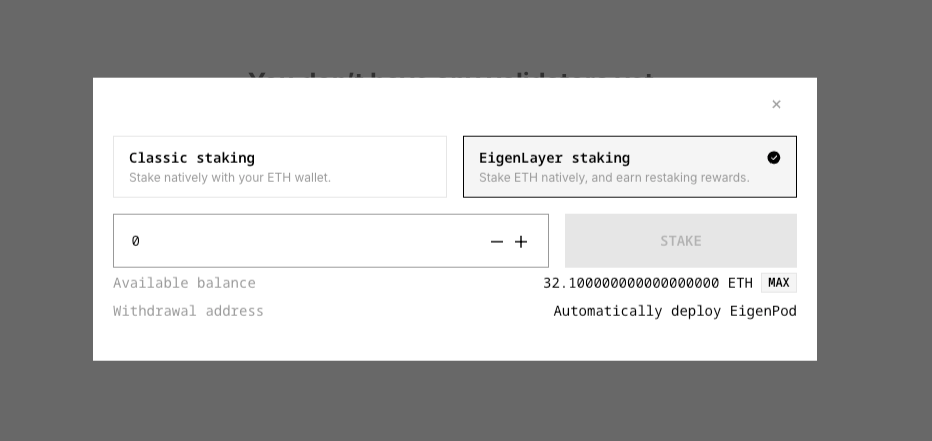
Step 5: Select how many validators you want to create.
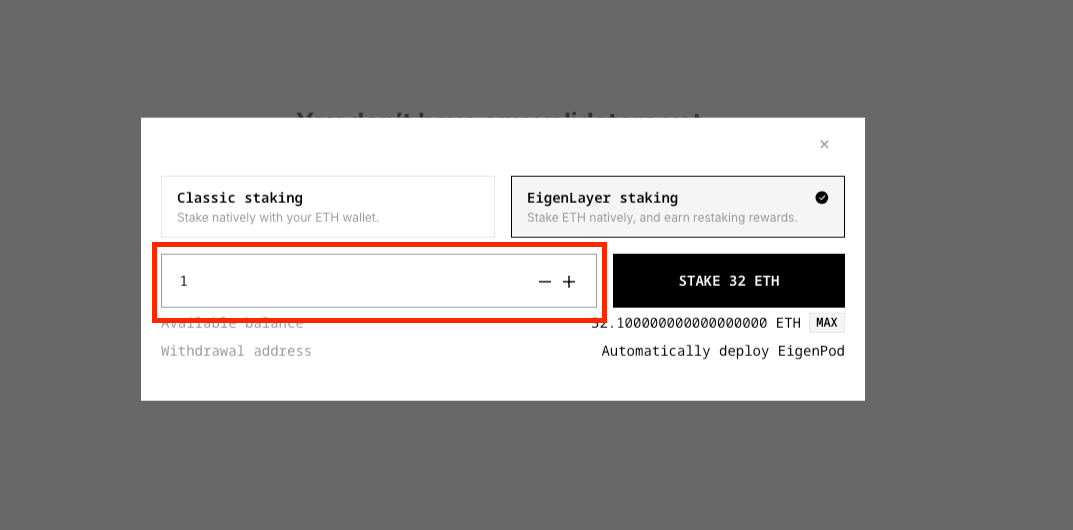
Step 6: Click “STAKE 32 ETH” to begin restaking with stakefish and EigenPod.
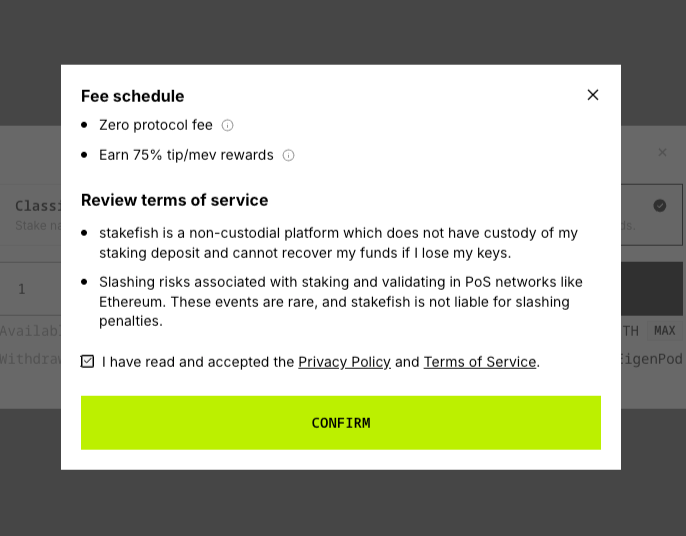
Step 7: Accept the terms of service and select "Confirm."
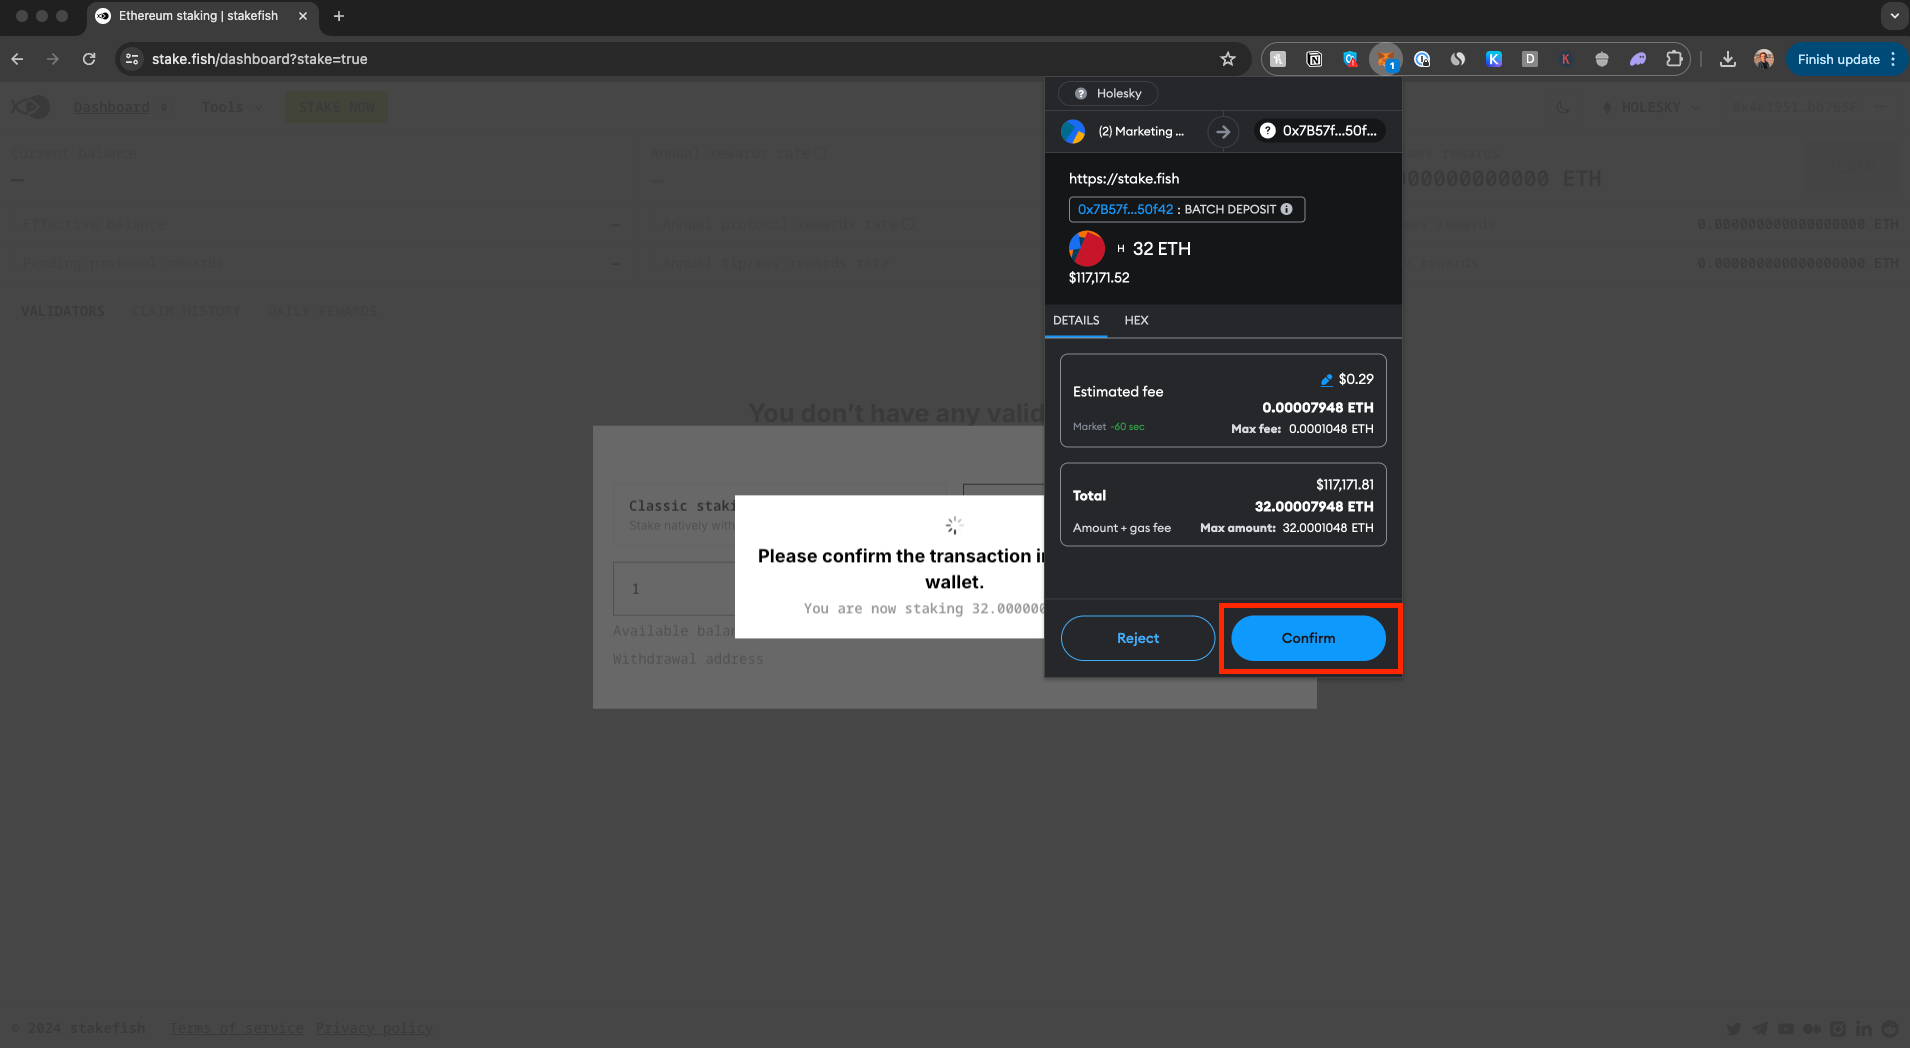
Step 8: Confirm the transactions in your wallet. If creating a new EigenPod you will approve two transactions: one confirming the EigenPod creation and another confirming that you are staking validator(s).
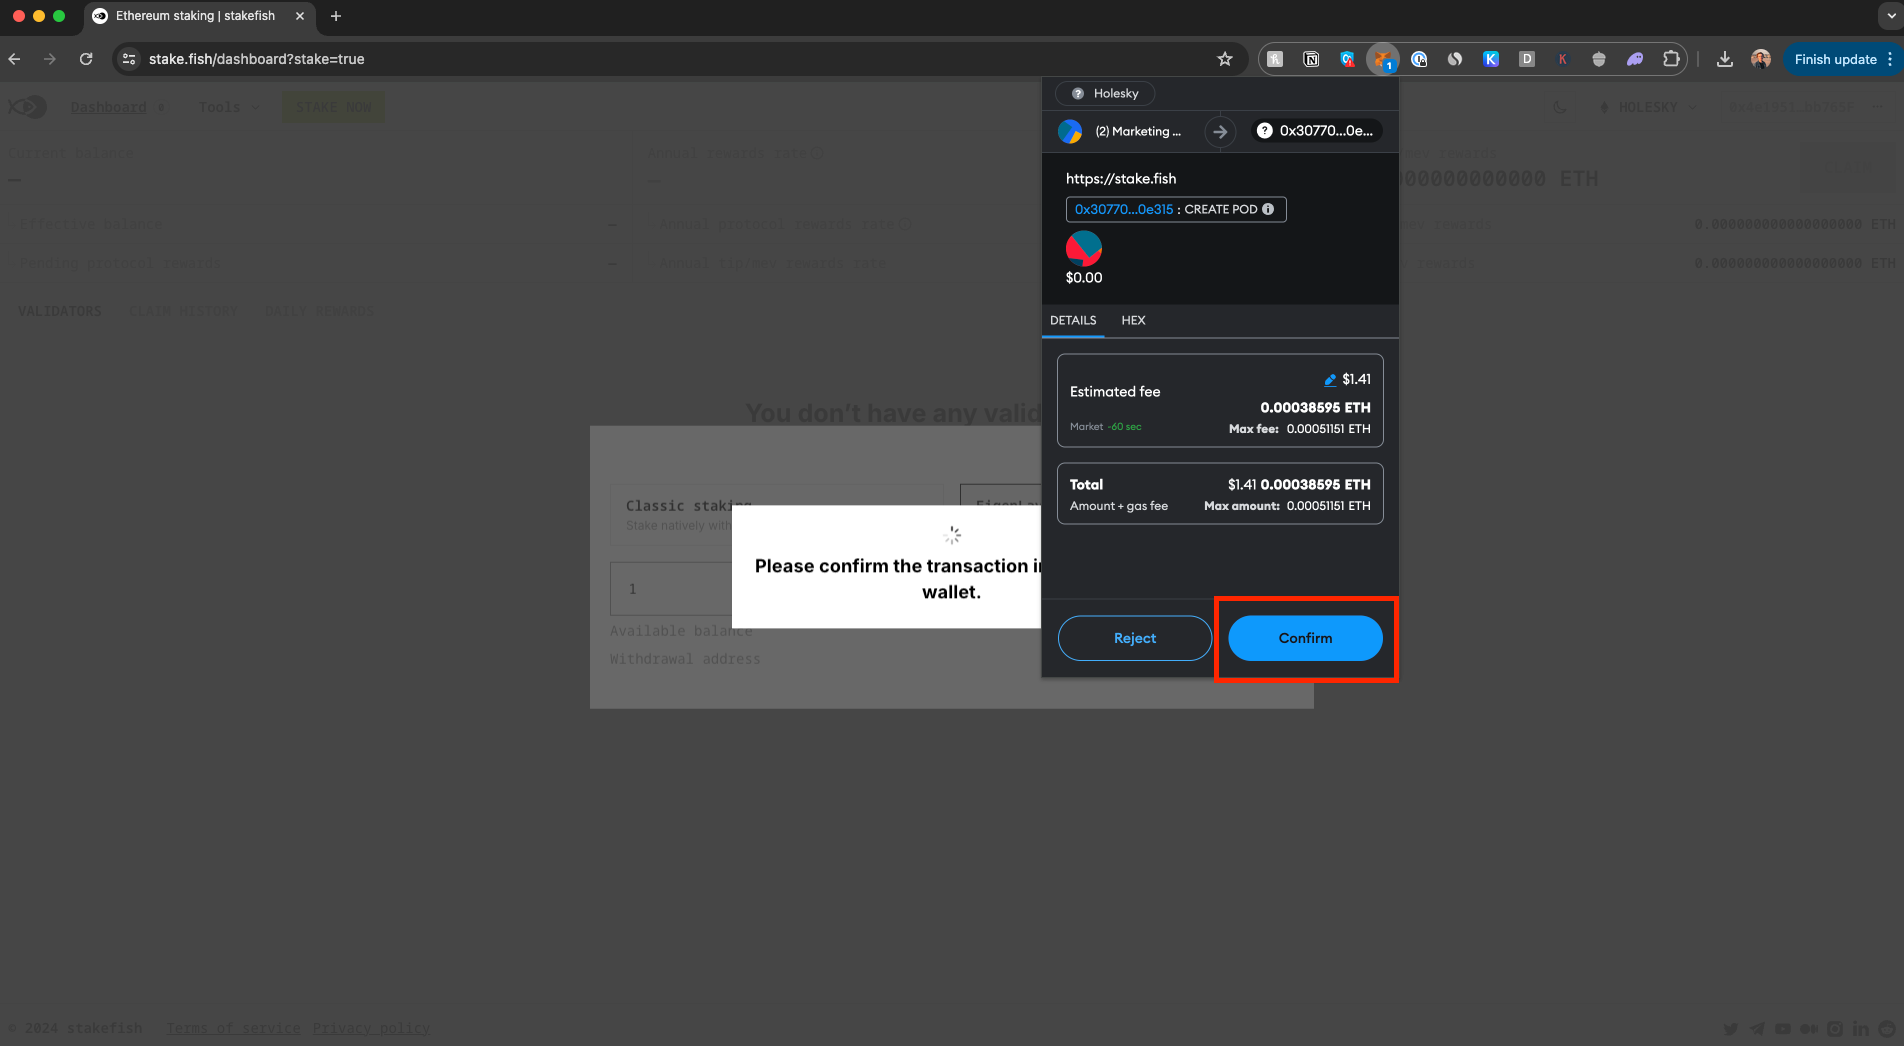
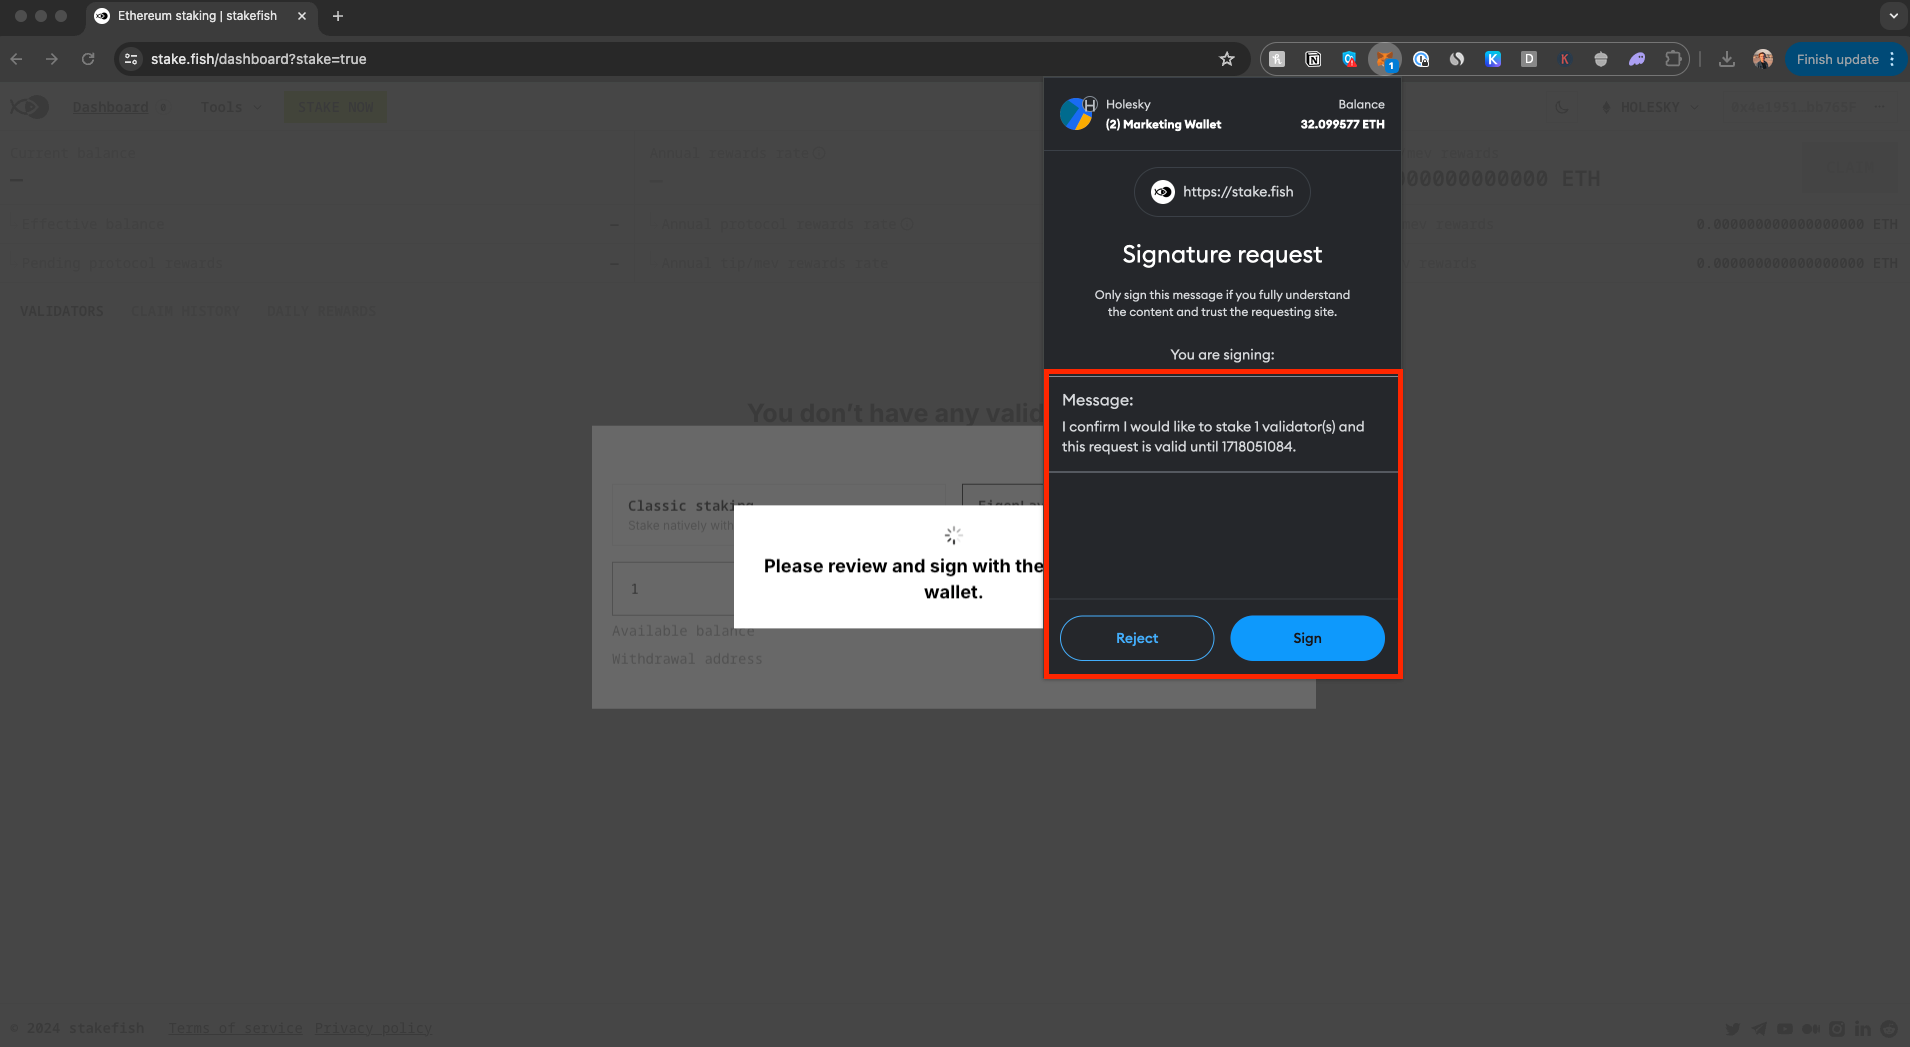
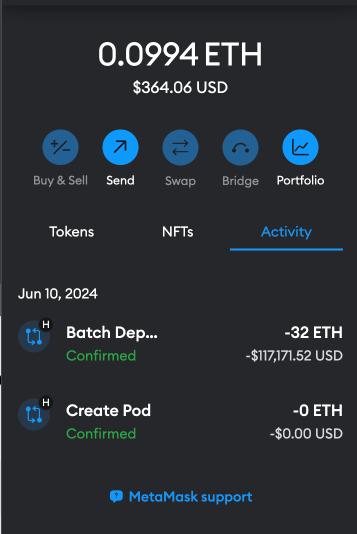
Once the transactions are confirmed, you will see an EigenPod and Batch Deposit for Ethereum staking transaction confirmations in your wallet.
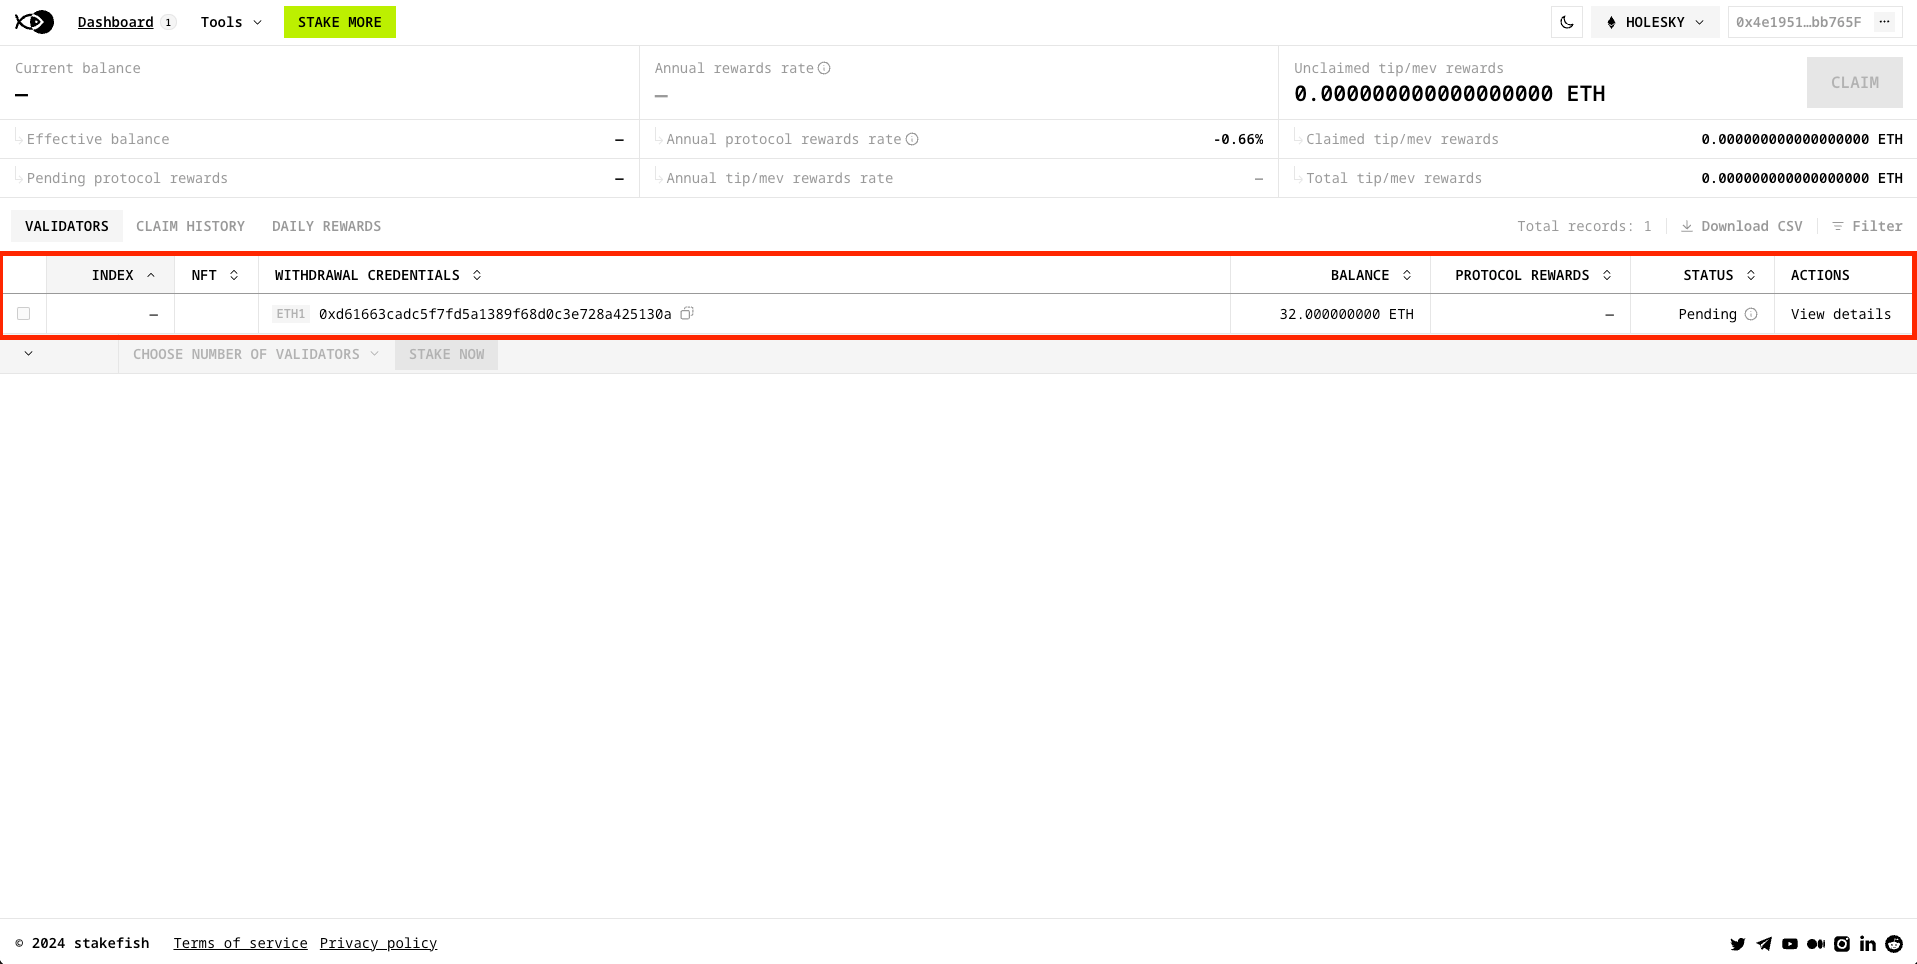
Step 9: Go to your dashboard to view the progress of your validator.
IMPORTANT: EigenPods are not designed for handling execution layer rewards (e.g., MEV boost). To claim priority tips/MEV, you must do so from your stakefish Ethereum staking dashboard.
2. Activate Restaking & Delegate on EigenLayer
Once the Validator is active on-chain and the withdrawal address has been configured to point to the EigenPod address (automatically done with stakefish), the Restake button will become active your EigenLayer webApp dashboard.
Step 1: After your ETH is staked through stakefish, go to EigenLayer.
Step 2: Click Restake to initiate restaking the validator. Then, select "Natively Staked Ether" from the assets page.
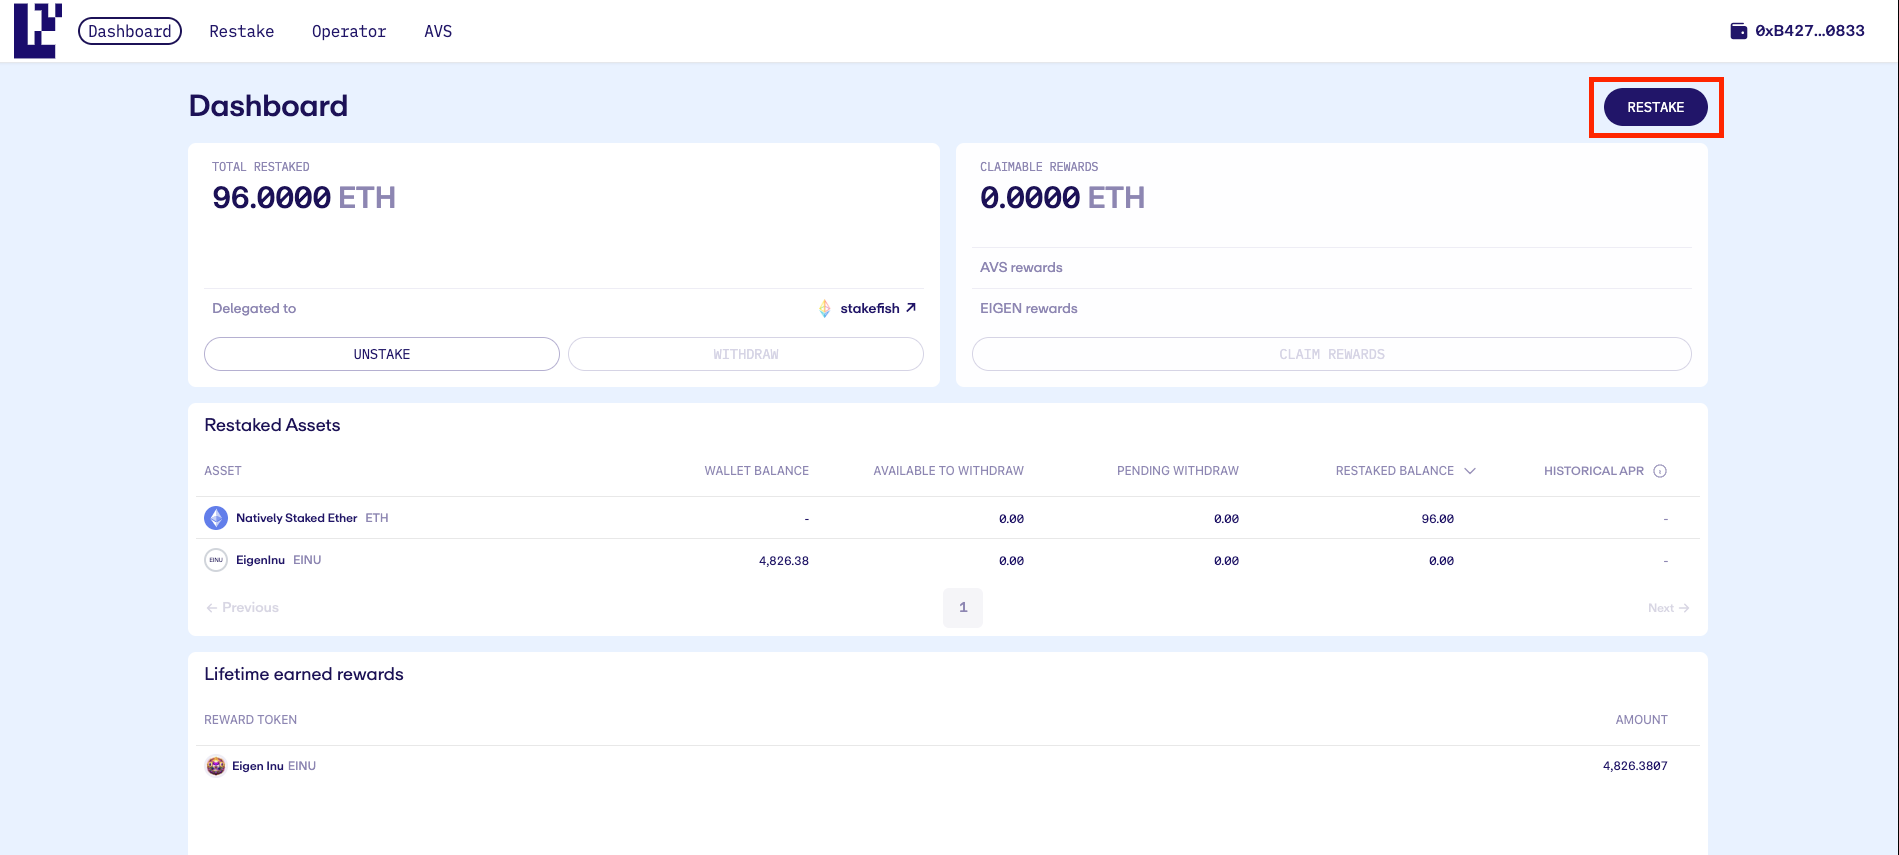
Step 3: Click "Restake." Sign the transaction with your web3 wallet.
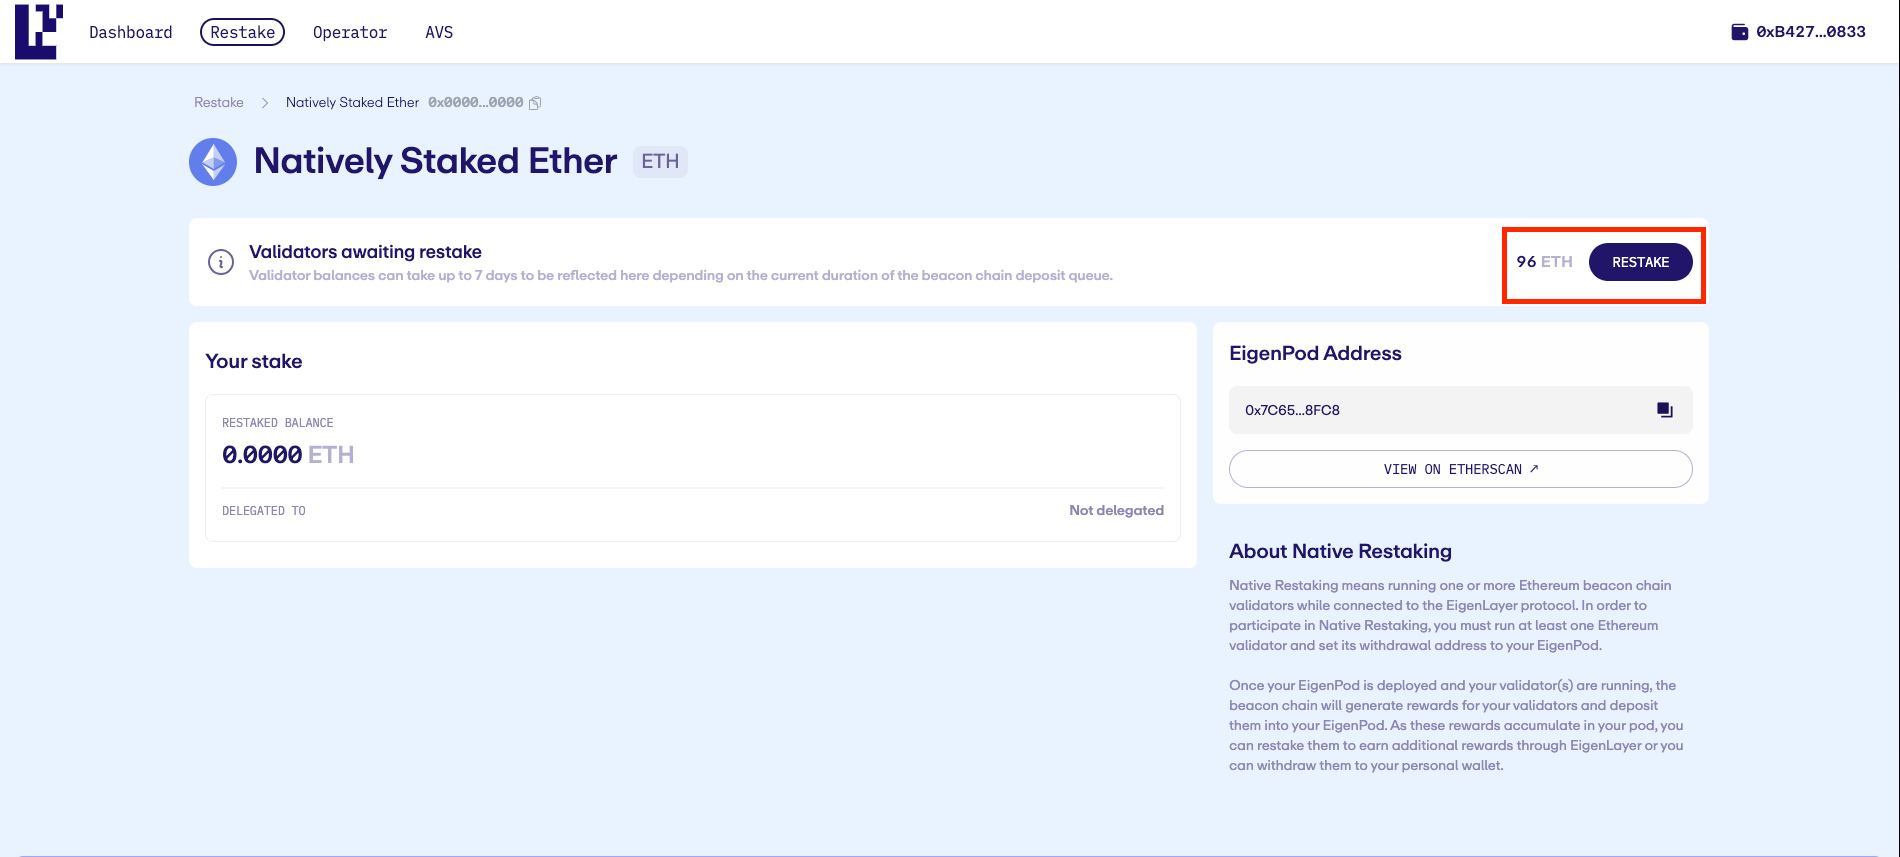
Step 4: Your validator(s) is now Restaked.
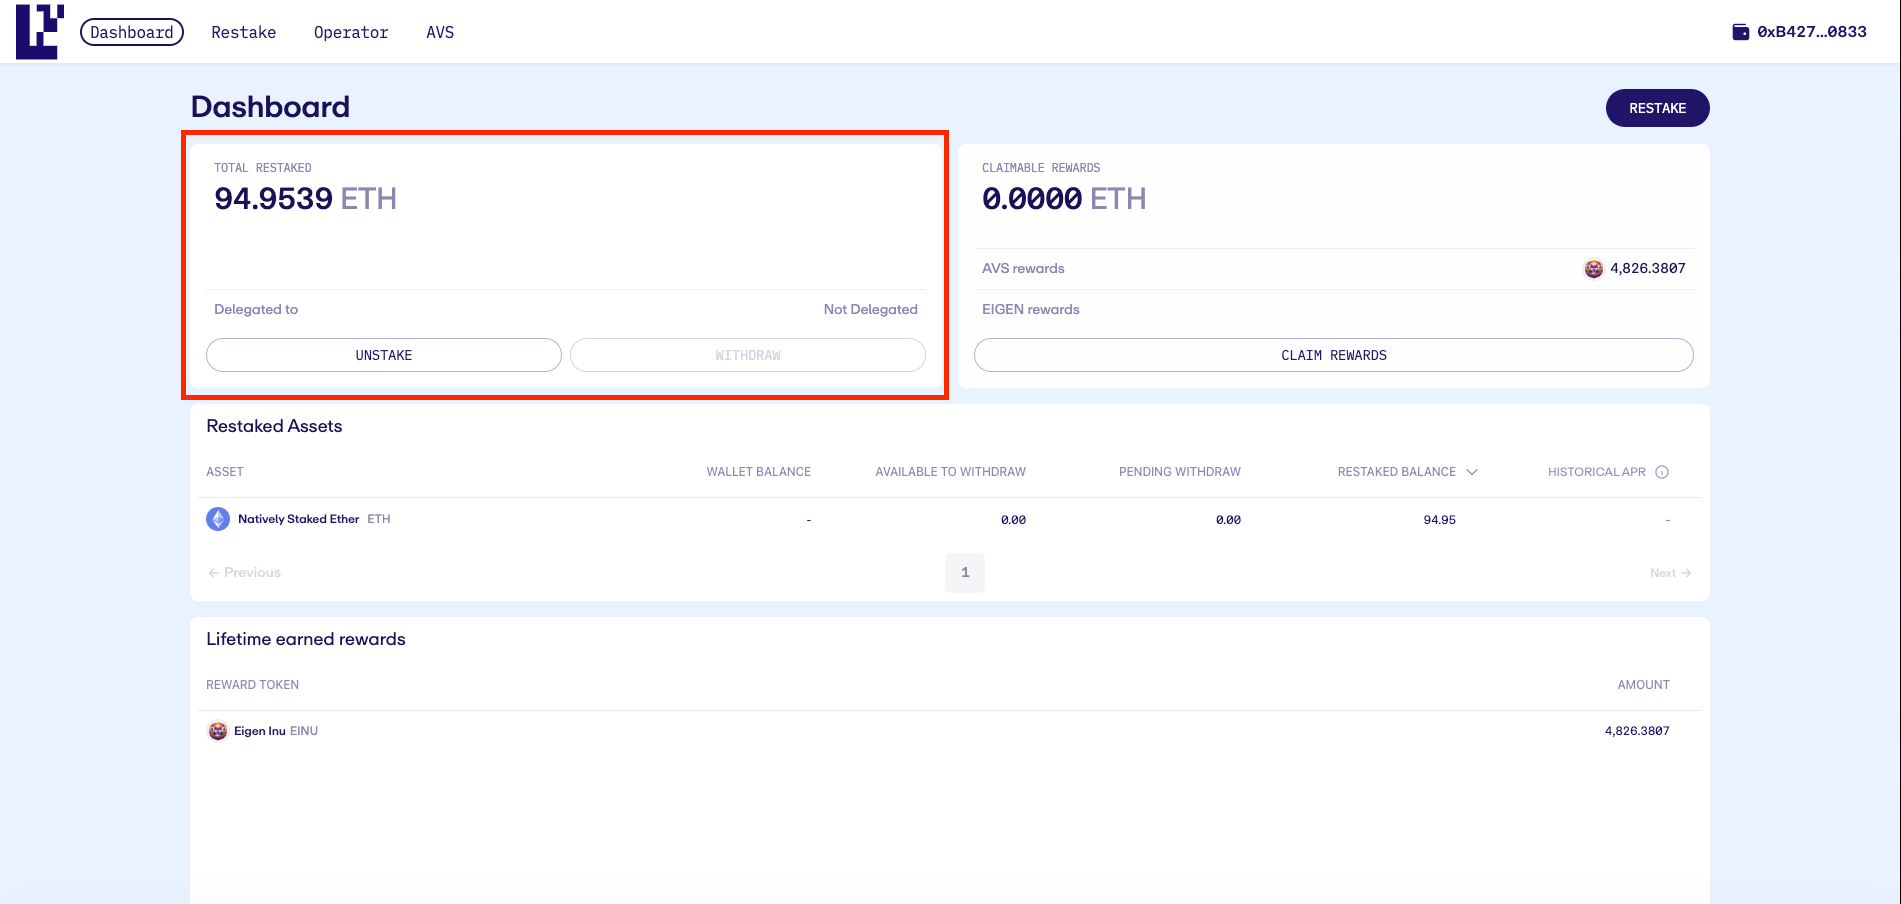
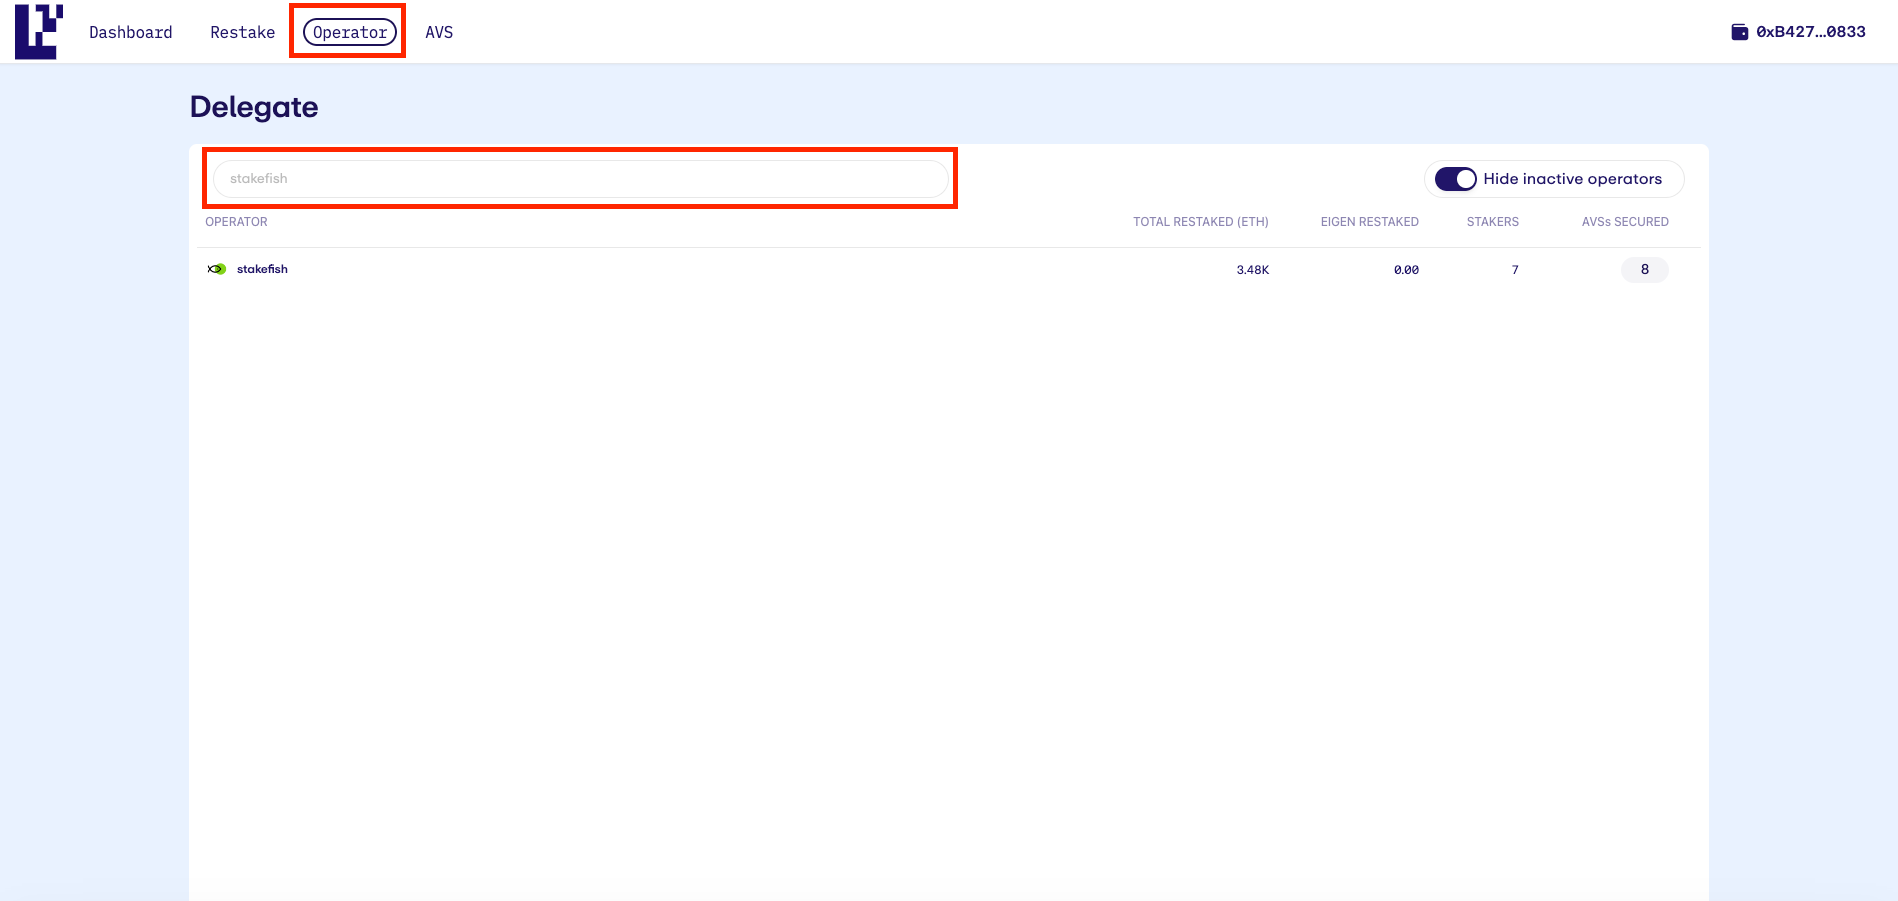
Step 5: After your ETH is restaked, delegate it to an EigenLayer node operator like stakefish. Delegating your restaked Ethereum to operators running AVS will enable restakers to earn additional AVS staking rewards.
To find stakefish, search for stakefish in the list of node operators.
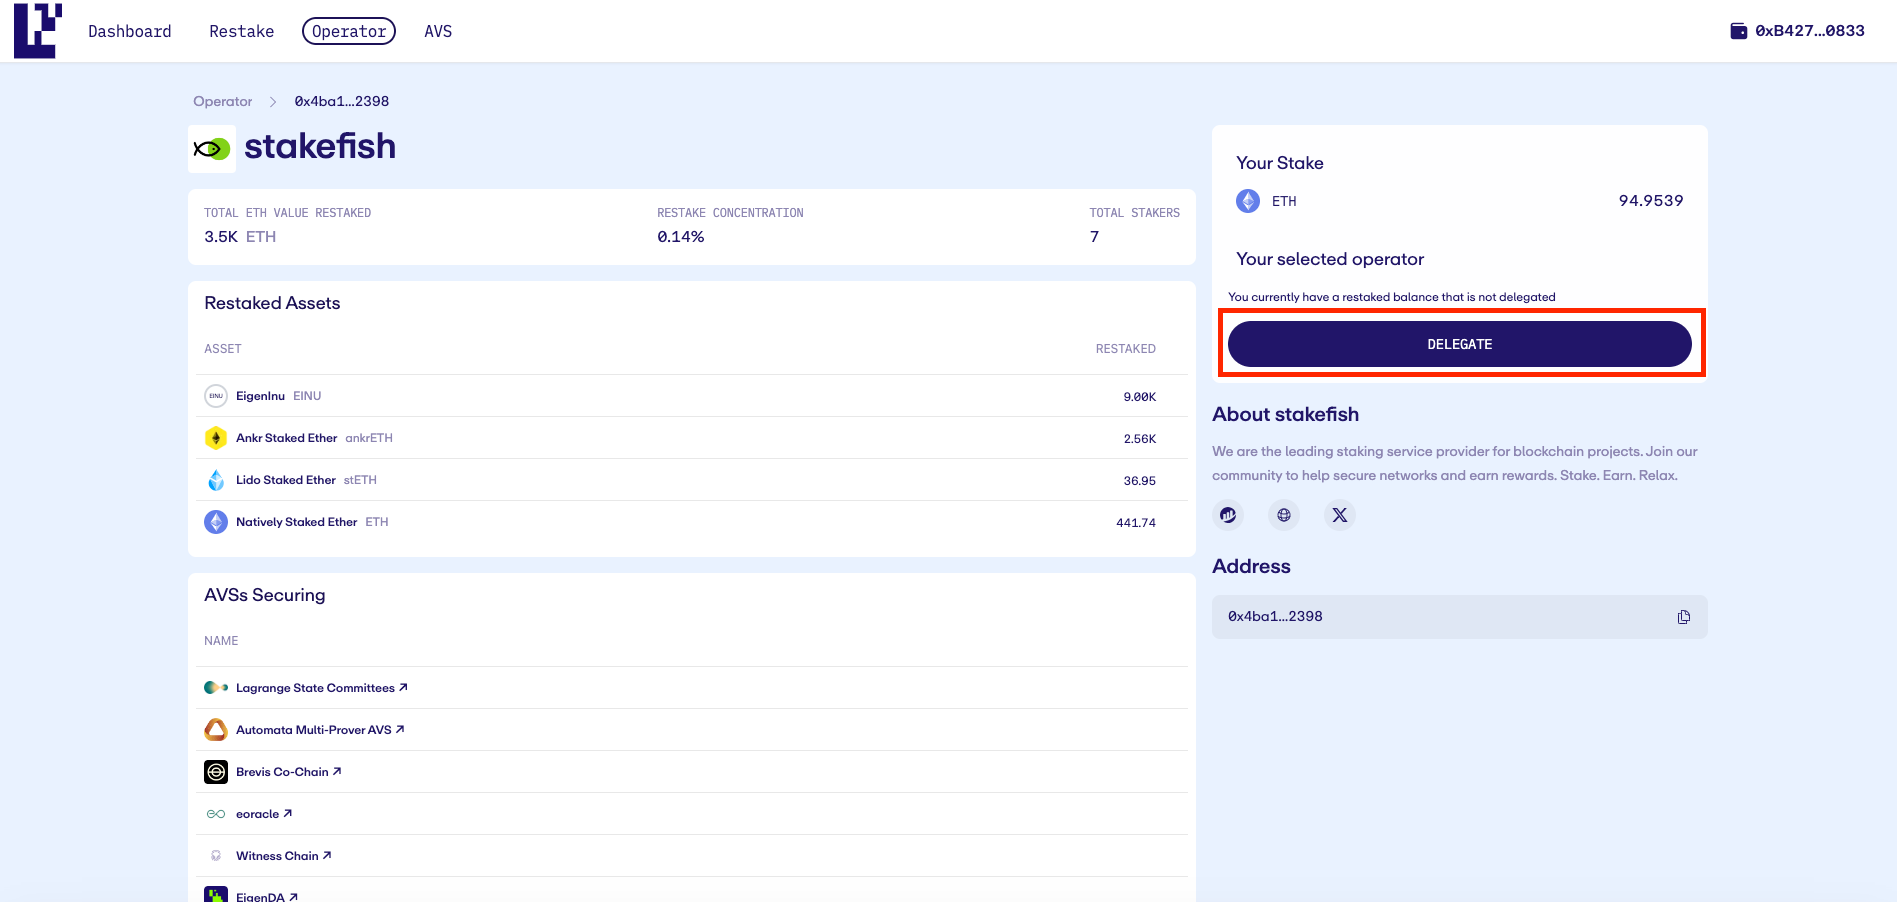
Step 6: Delegate your restaked ETH to stakefish.
At the time of writing, stakefish is supporting 13 AVSs. We plan to add support for more AVSs in the future.
Click here to delegate your restaked ETH to stakefish.
Withdrawals from EigenLayer
In EigenLayer's native restaking, withdrawals come in two forms:
Partial Withdrawals: Any balance over 32 ETH representing earned rewards can be withdrawn to an Ethereum address for immediate use. The validator remains active on the beacon chain, continuing to validate.
Full Withdrawals: This involves the validator ceasing its role and exiting the Beacon Chain. Subsequently, the entire balance, including the initial 32 ETH and accrued rewards, becomes unlocked and available for spending after completing the exit and withdrawal process.
Full Withdrawals
This section to help you withdraw from Ethereum consensus and EigenLayer with 32 ETH + staking rewards
All funds unstaked from EigenLayer go through a 7-day escrow period before being able to be withdrawn. Thus after you initiate your unstake, you must wait 7-days before being able to withdraw your assets.
Step 1: Withdraw from the Ethereum Network through your stakefish dashboard
First, initiate a withdrawal from stakefish to your EigenPod contract.
Once you withdraw from Ethereum, your staked ETH balance is credited to your EigenPod address and can be viewed on the EigenLayer app.
To withdraw from your stakefish Ethereum staking dashboard click “View details.”
From the validator detail page click “...” in the upper right corner and select “Request exit” to be taken to a page to complete full withdrawal.
After withdrawing from Ethereum, your staked ETH balance will be transferred to your EigenPod address. Your EigenPod balance can be accessed and monitored through the EigenLayer dashboard.
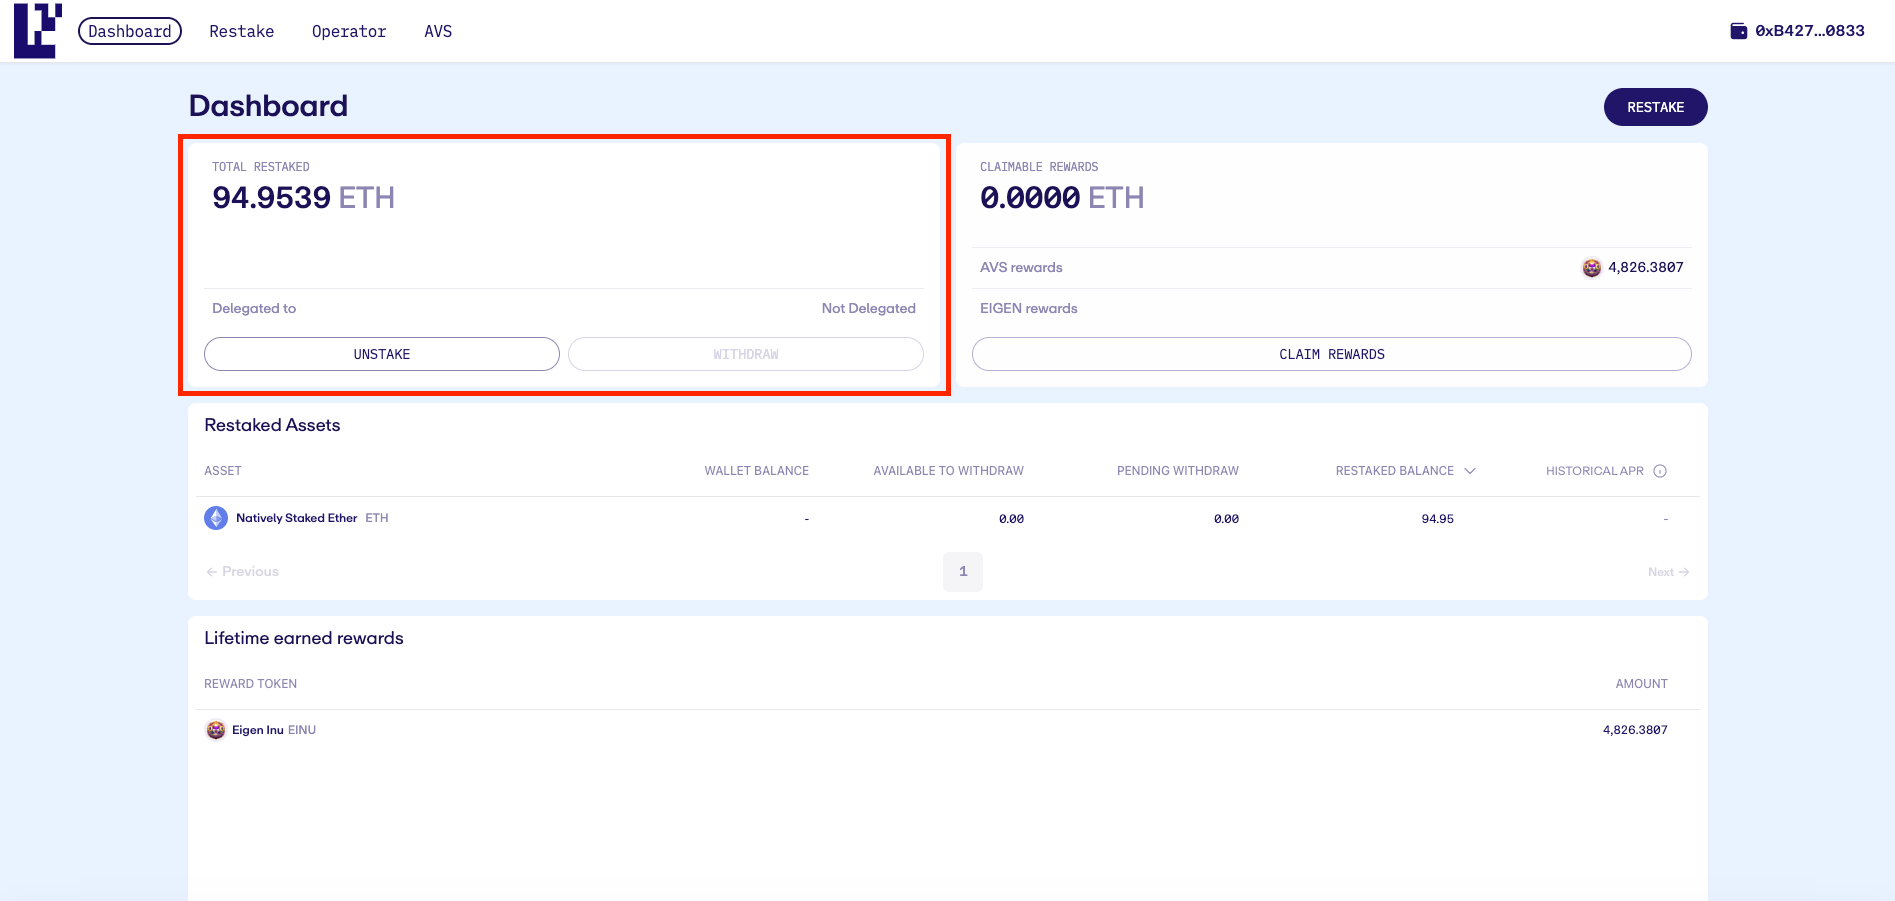
Step 2: Select 'Unstake' to begin the 7-day escrow period. After the transaction is confirmed, your EigenPod balance will shift to 'Unstake pending' status.
Step 3: After the 7-day escrow period ends, click 'Withdraw' to move the ETH into your wallet.
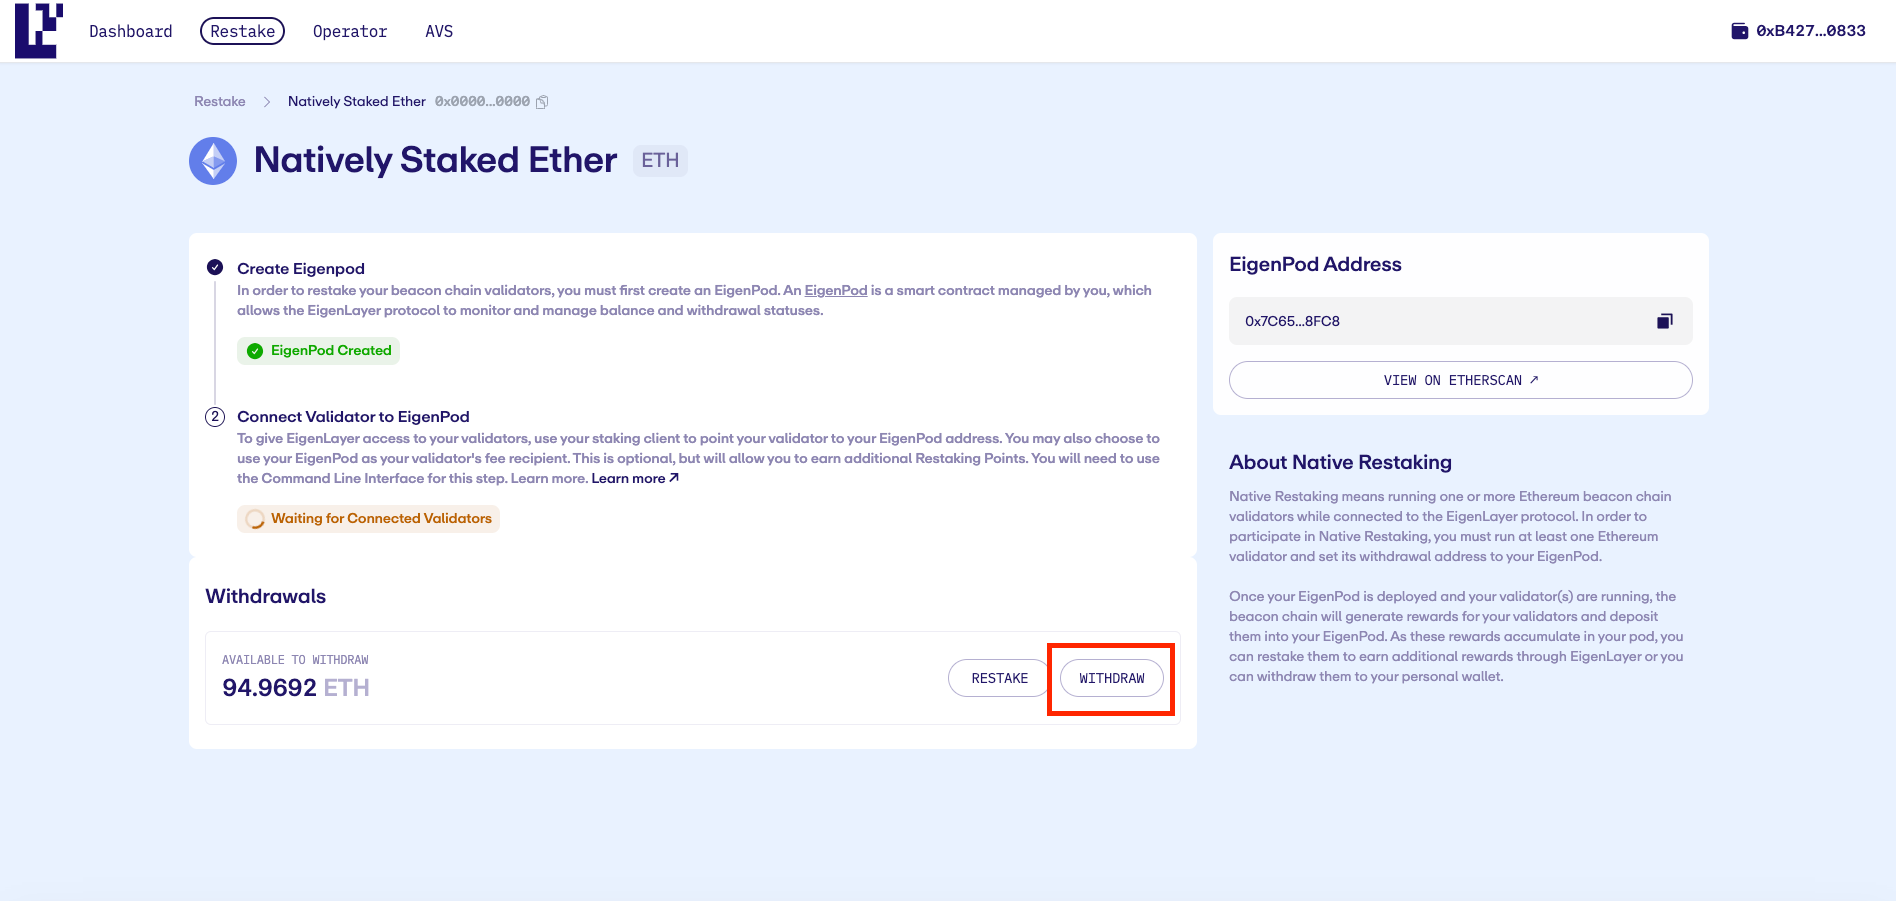
If successful, your dashboard will remove the withdrawal section, and the funds will be deposited into your wallet. Check your wallet to confirm your funds.
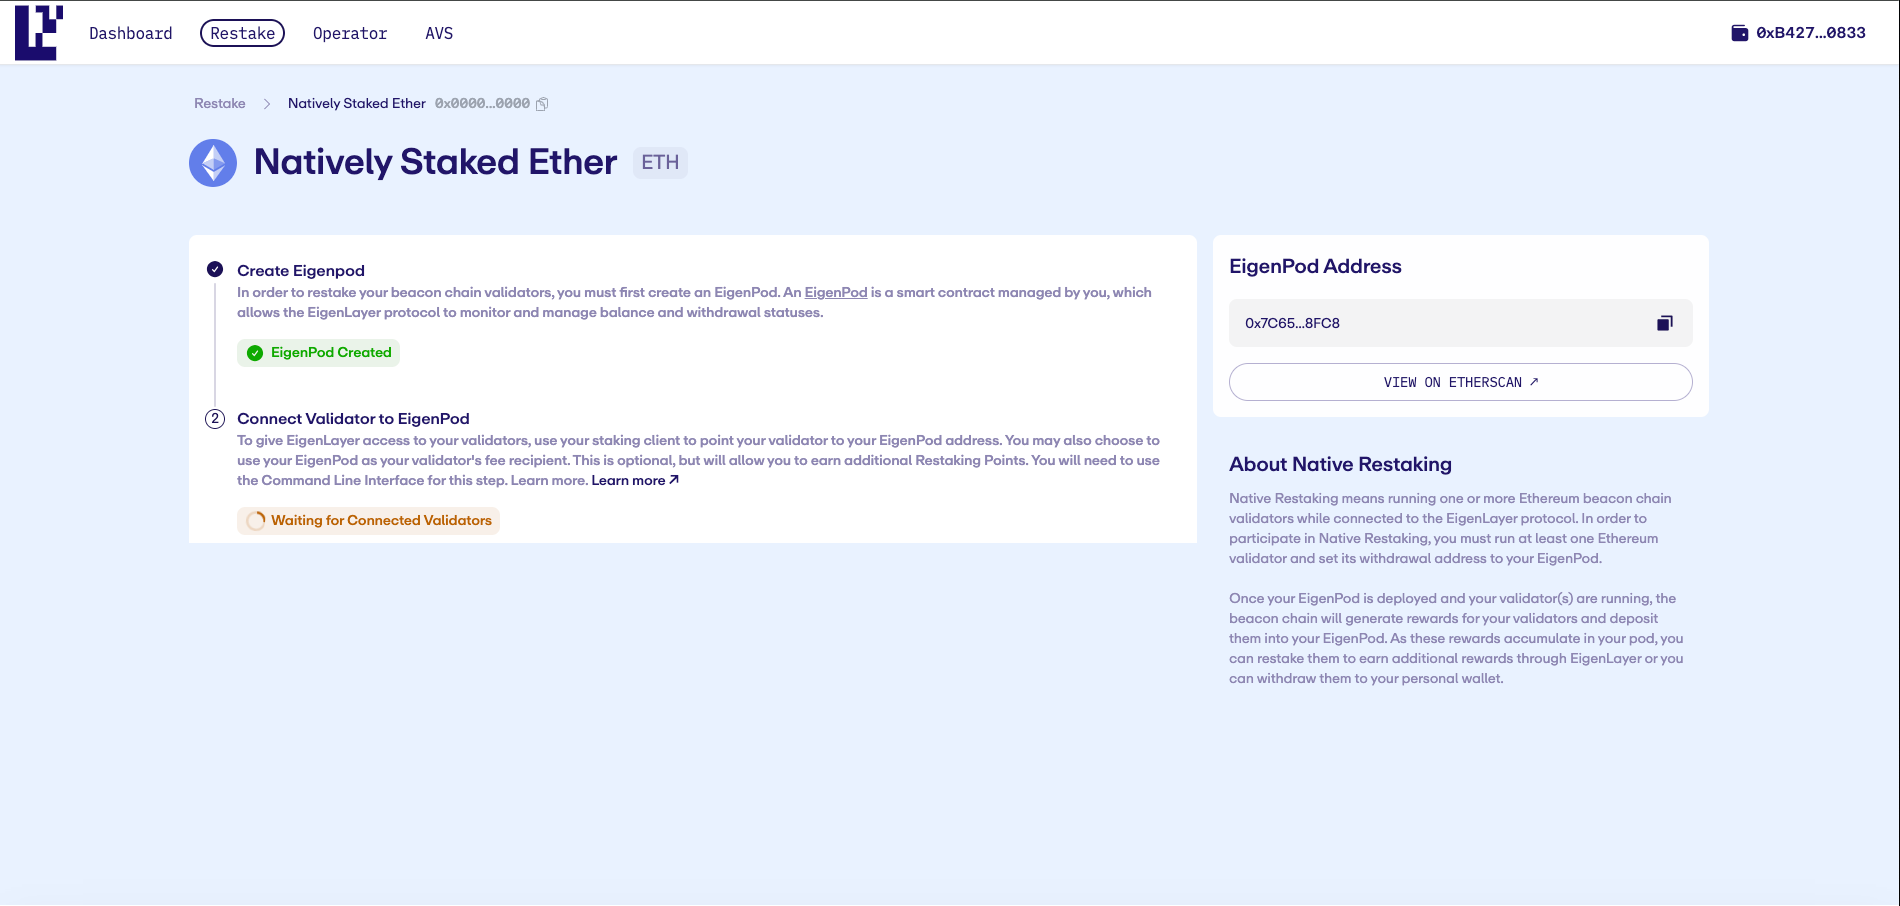
Partial Withdrawals
This section will help you withdraw your Ethereum staking rewards (to date).
Note: The design of Ethereum withdrawals allows only one partial withdrawal per validator sweep cycle, typically spanning 4 to 5 days.
Any funds unstaked from EigenLayer are subject to a 7-day escrow period. Therefore, once you initiate an unstake, a waiting period of 7 days is required before you can withdraw your assets.
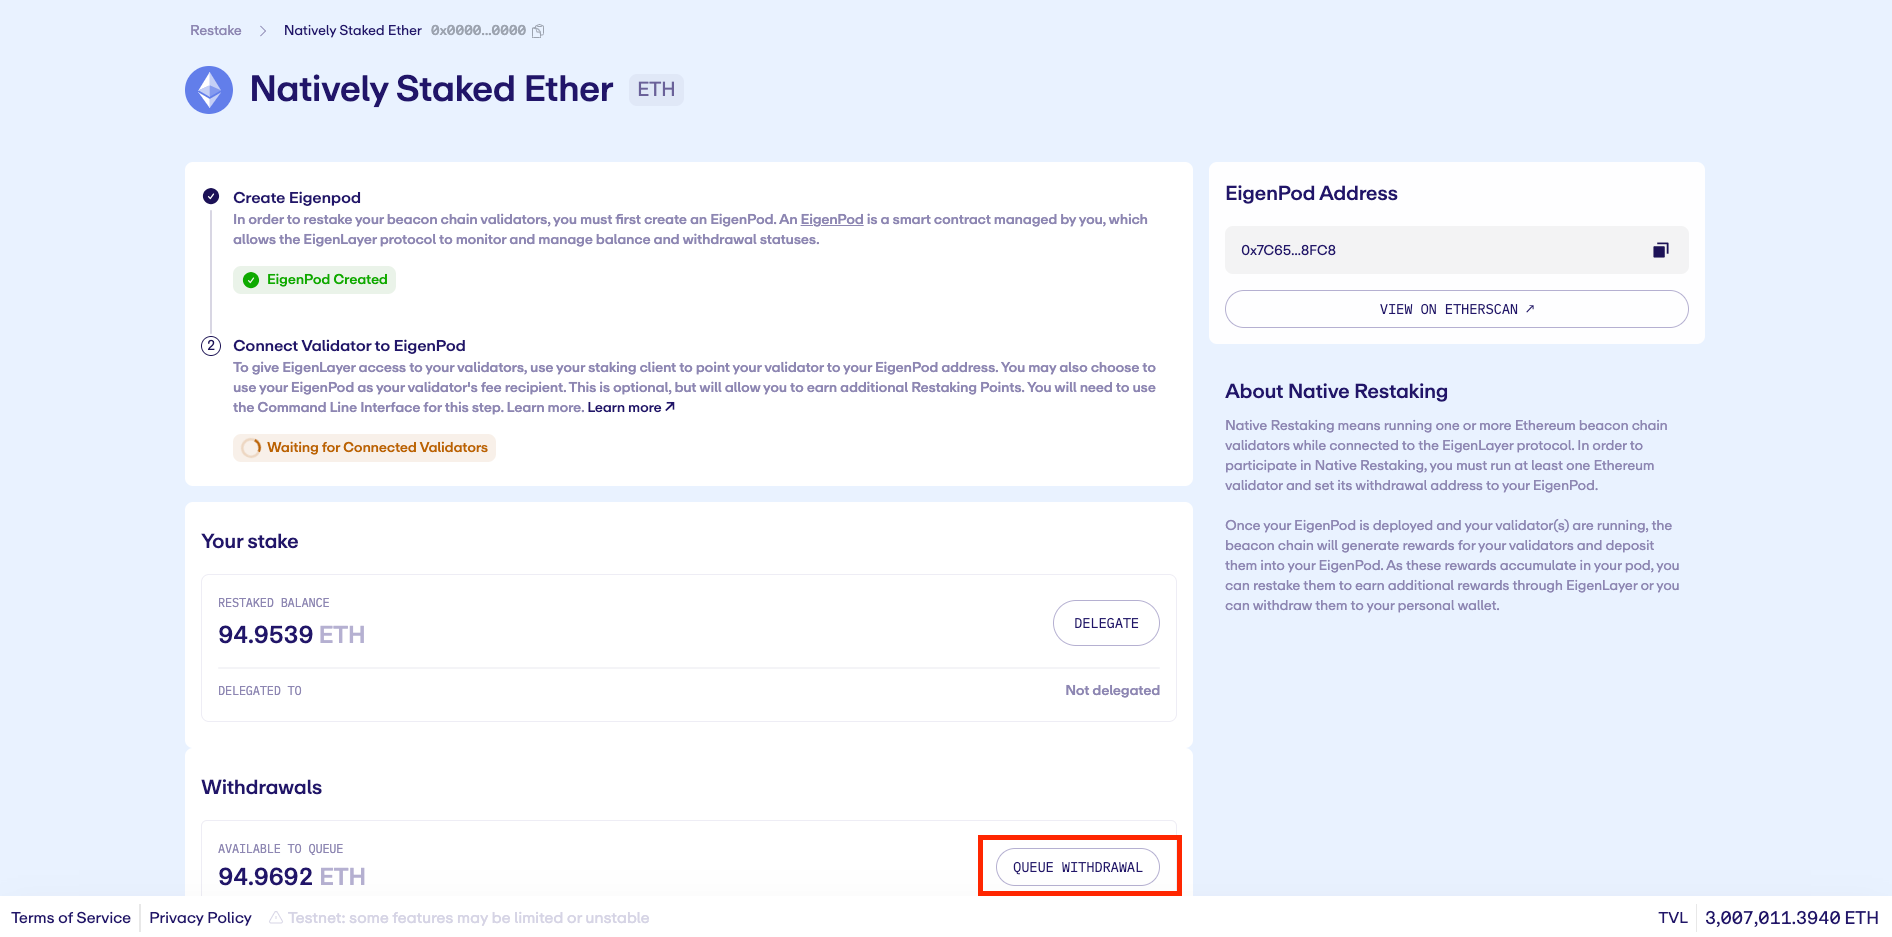
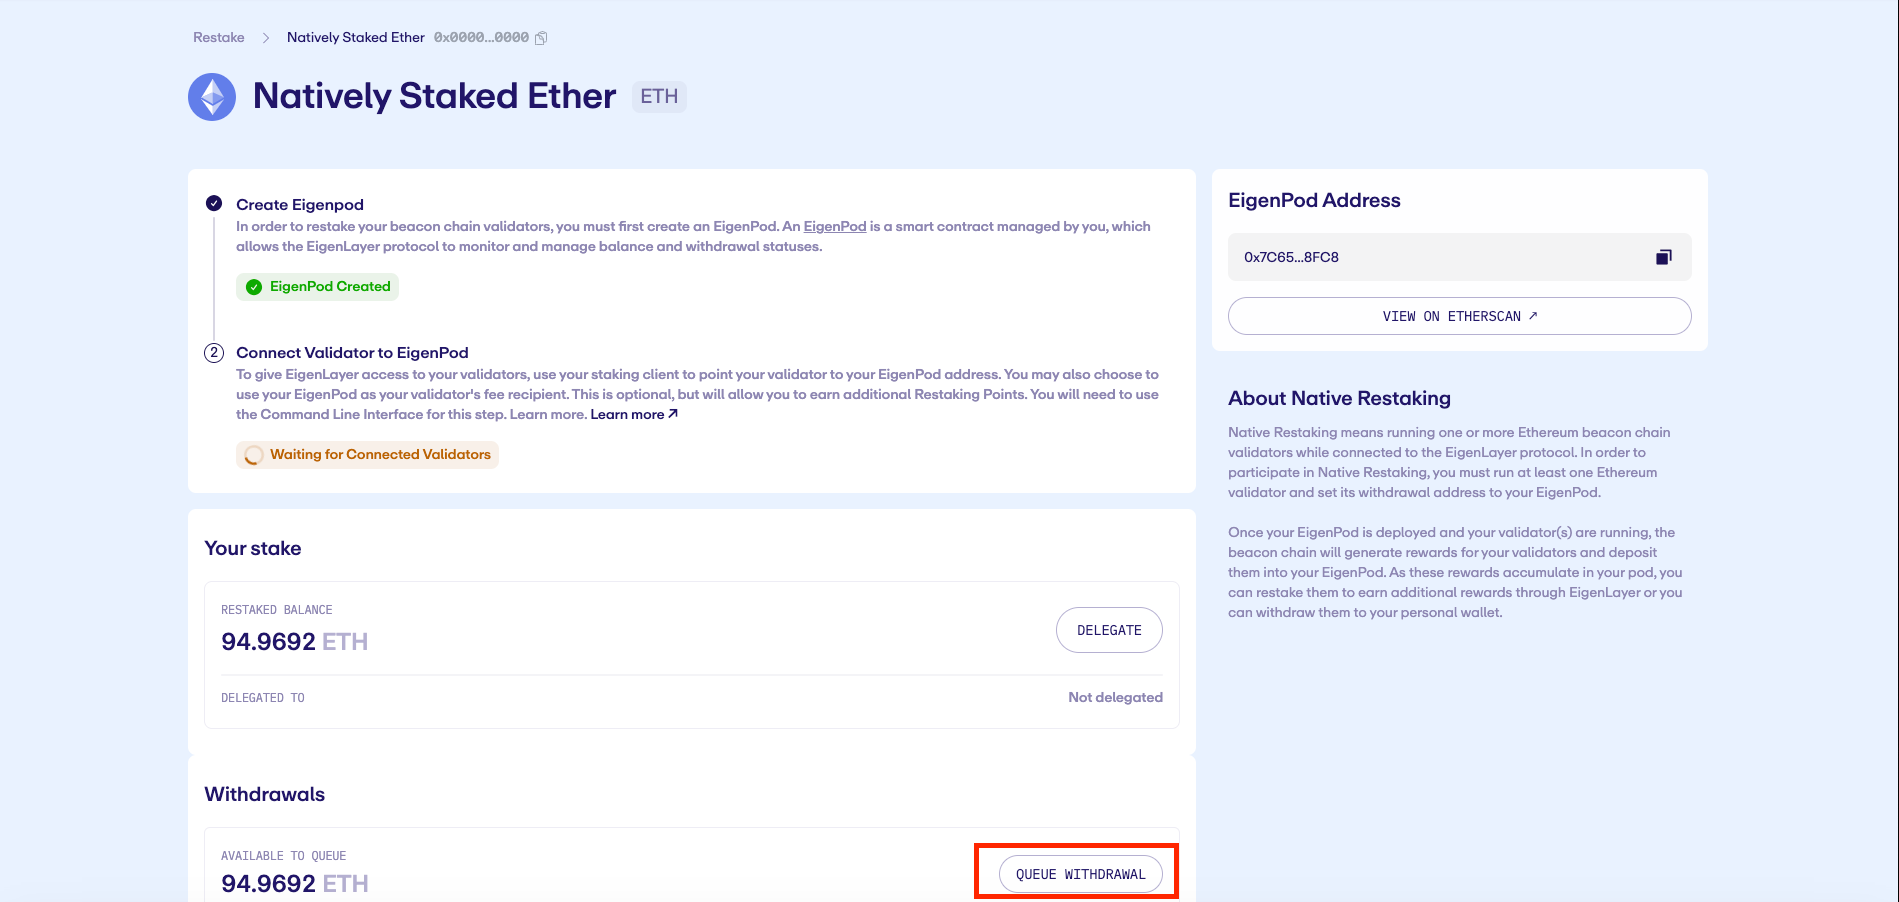
Step 1: Click Queue Withdrawal to initiate the escrow period.
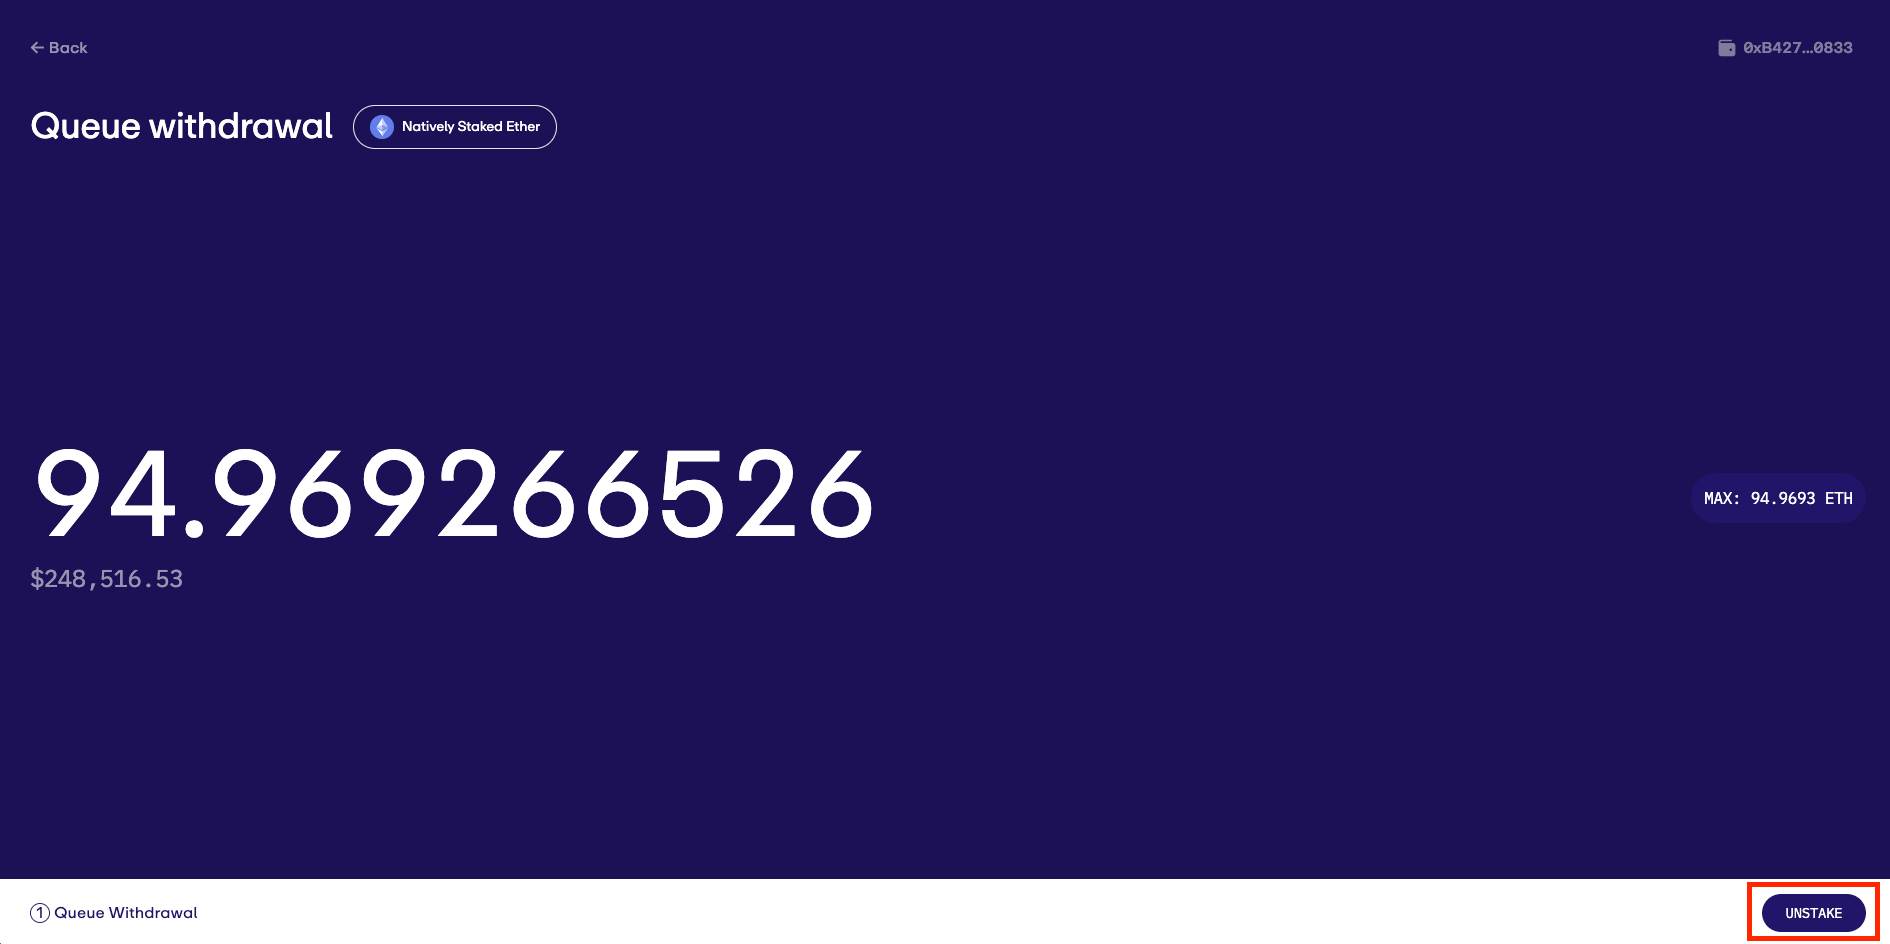
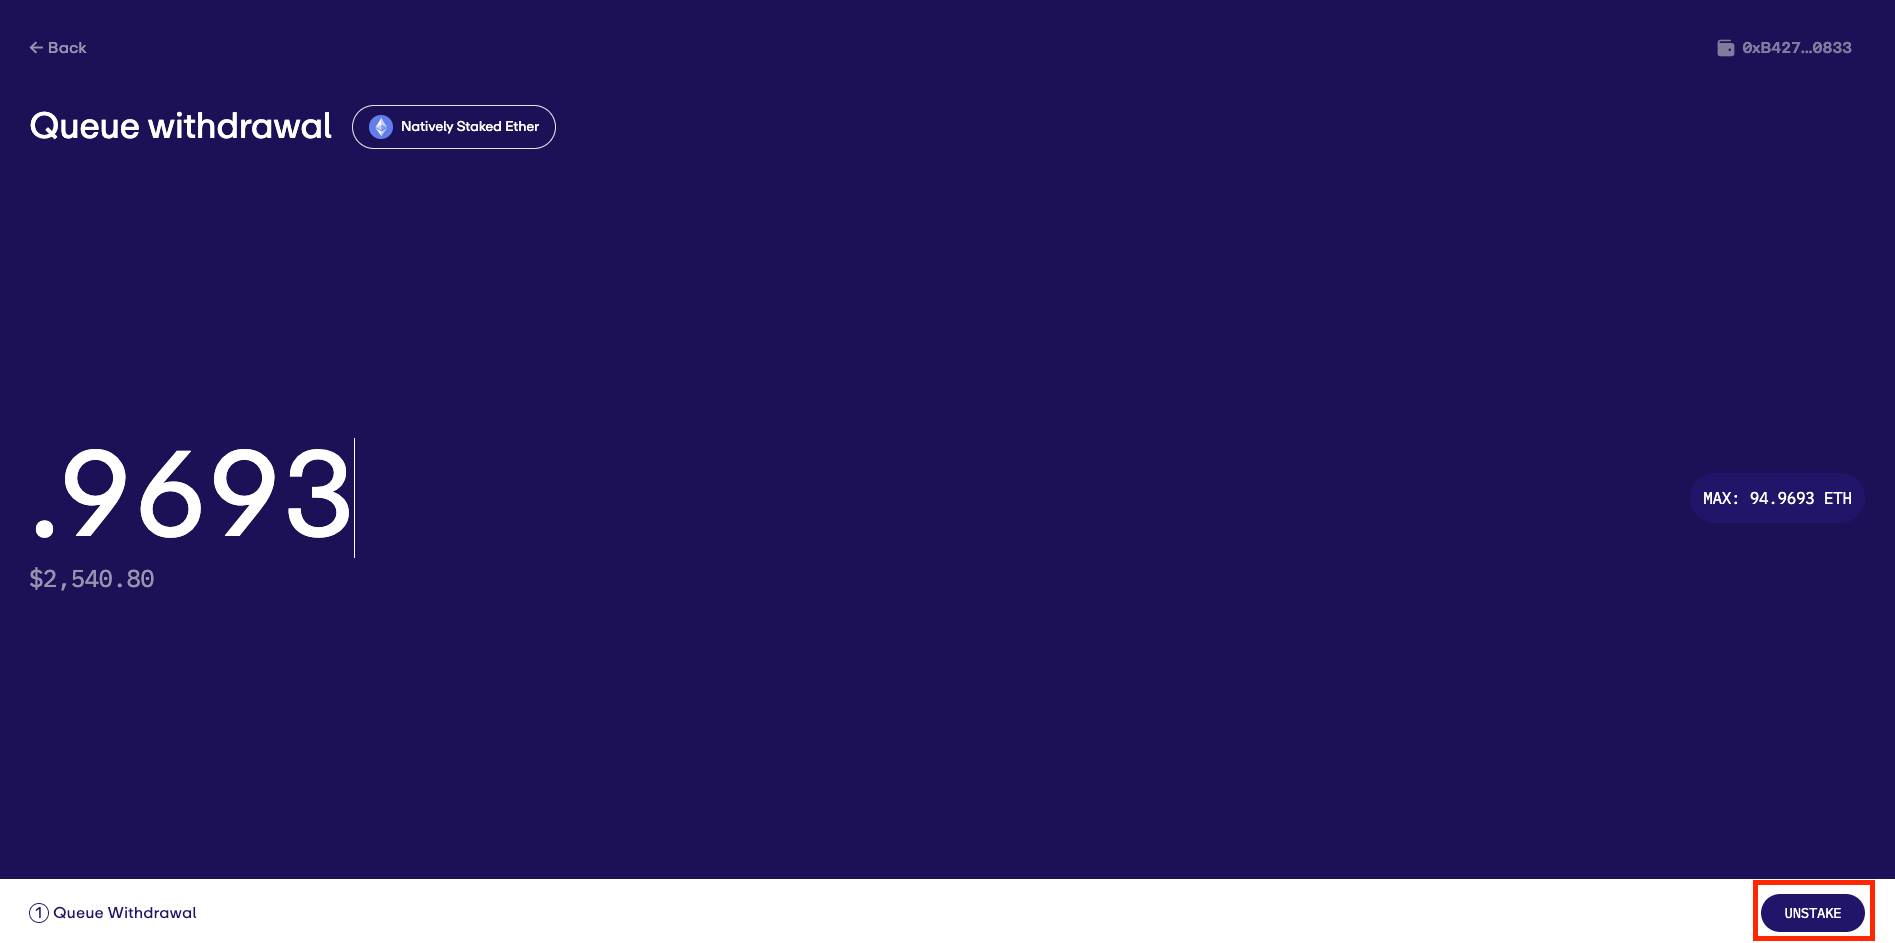
Step 2: Enter the amount you wish to withdraw, click "Unstake," and confirm the transaction.
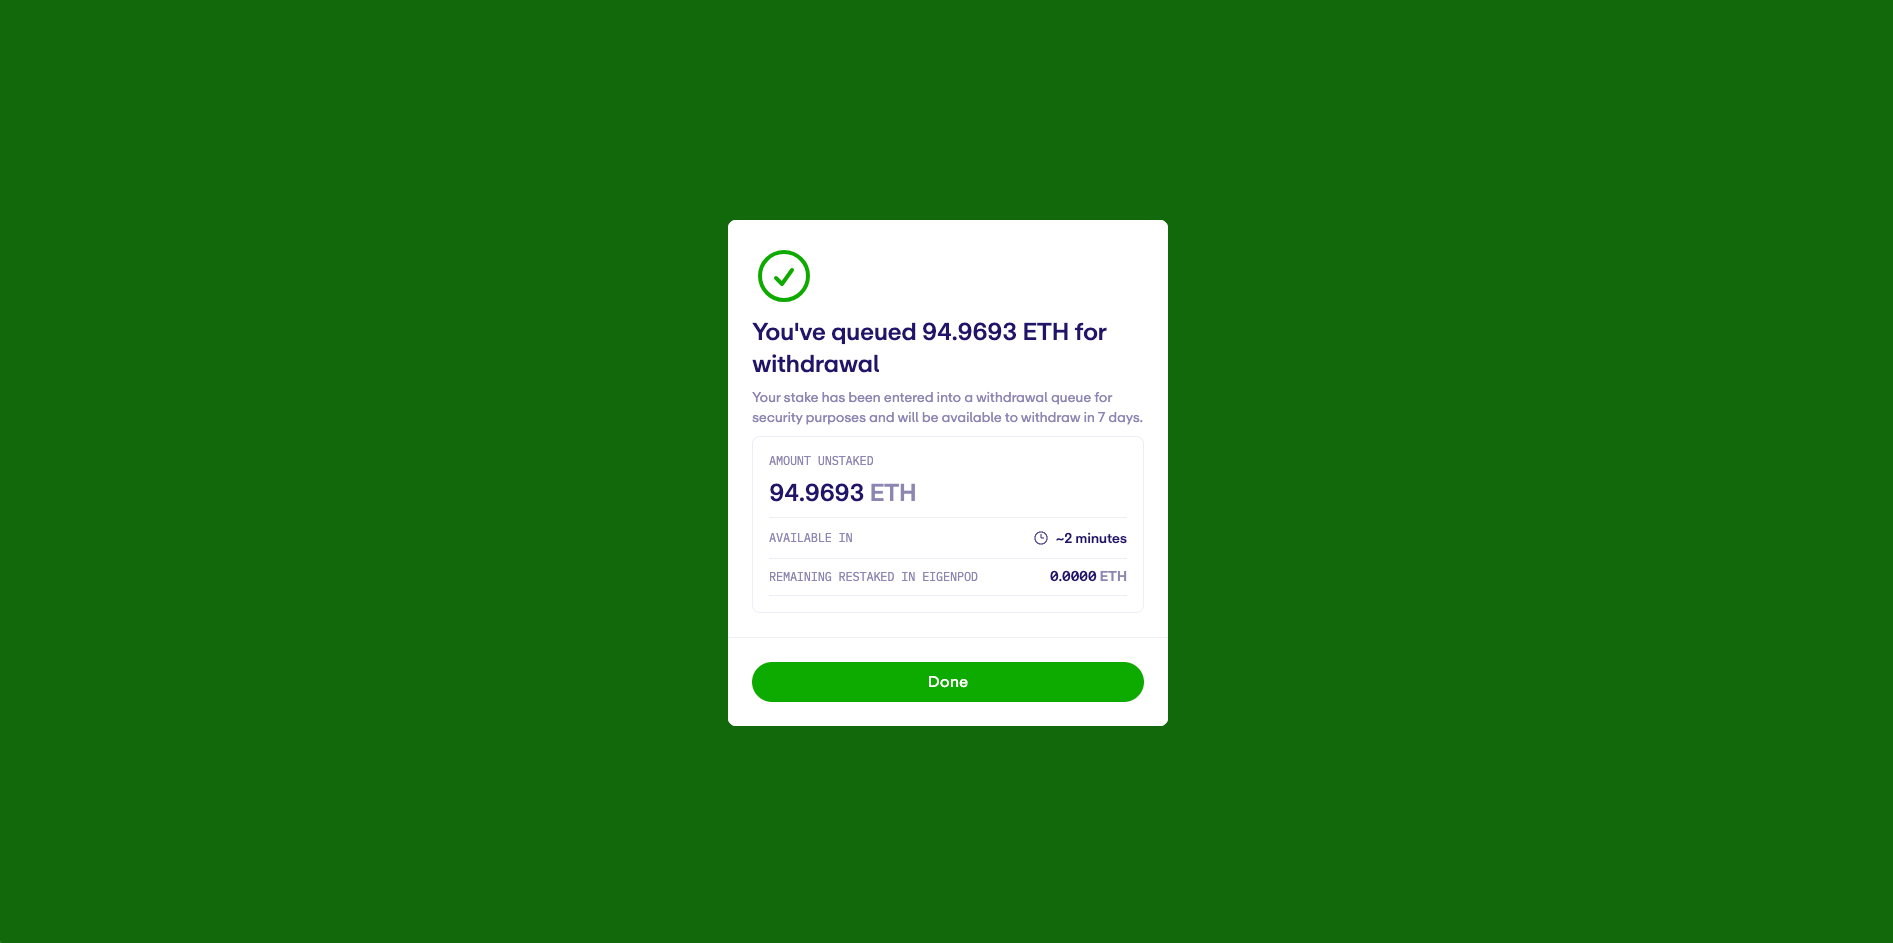
If successful, you will receive the following confirmation:
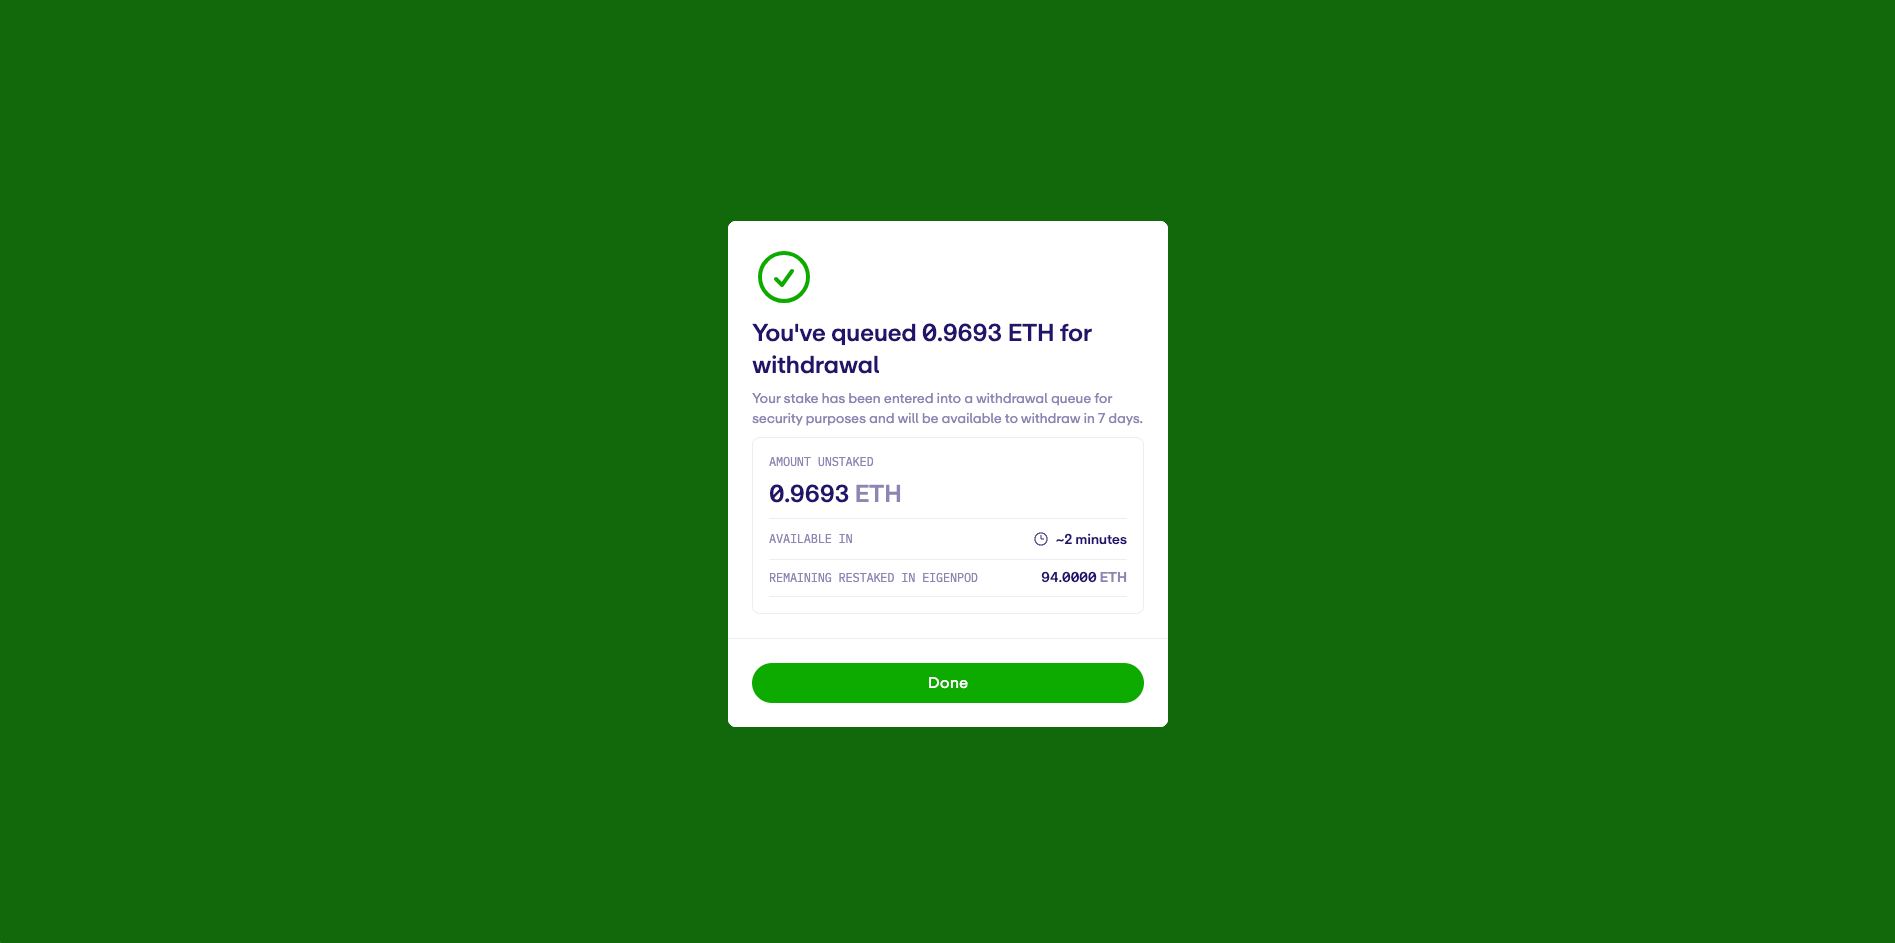
After the transaction is verified, your EigenPod balance will update to reflect a status for the “Withdrawal queue”
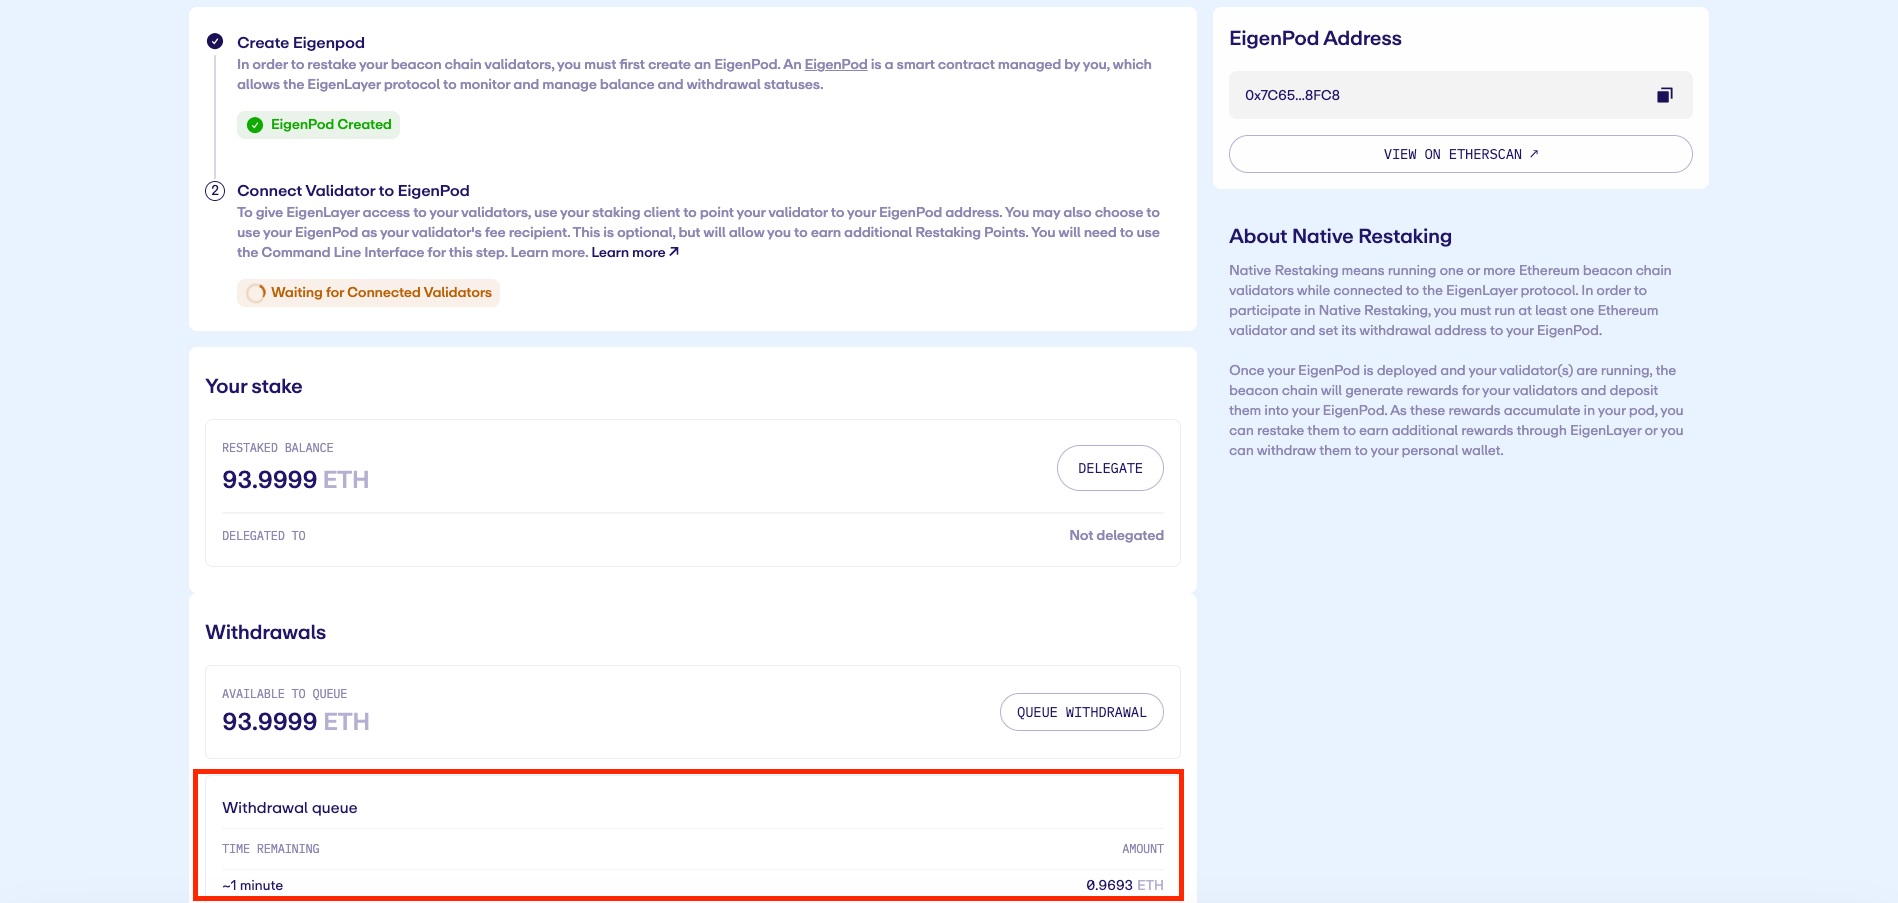
Step 3: After the escrow period ends, click 'Withdraw' to move the funds into your wallet.
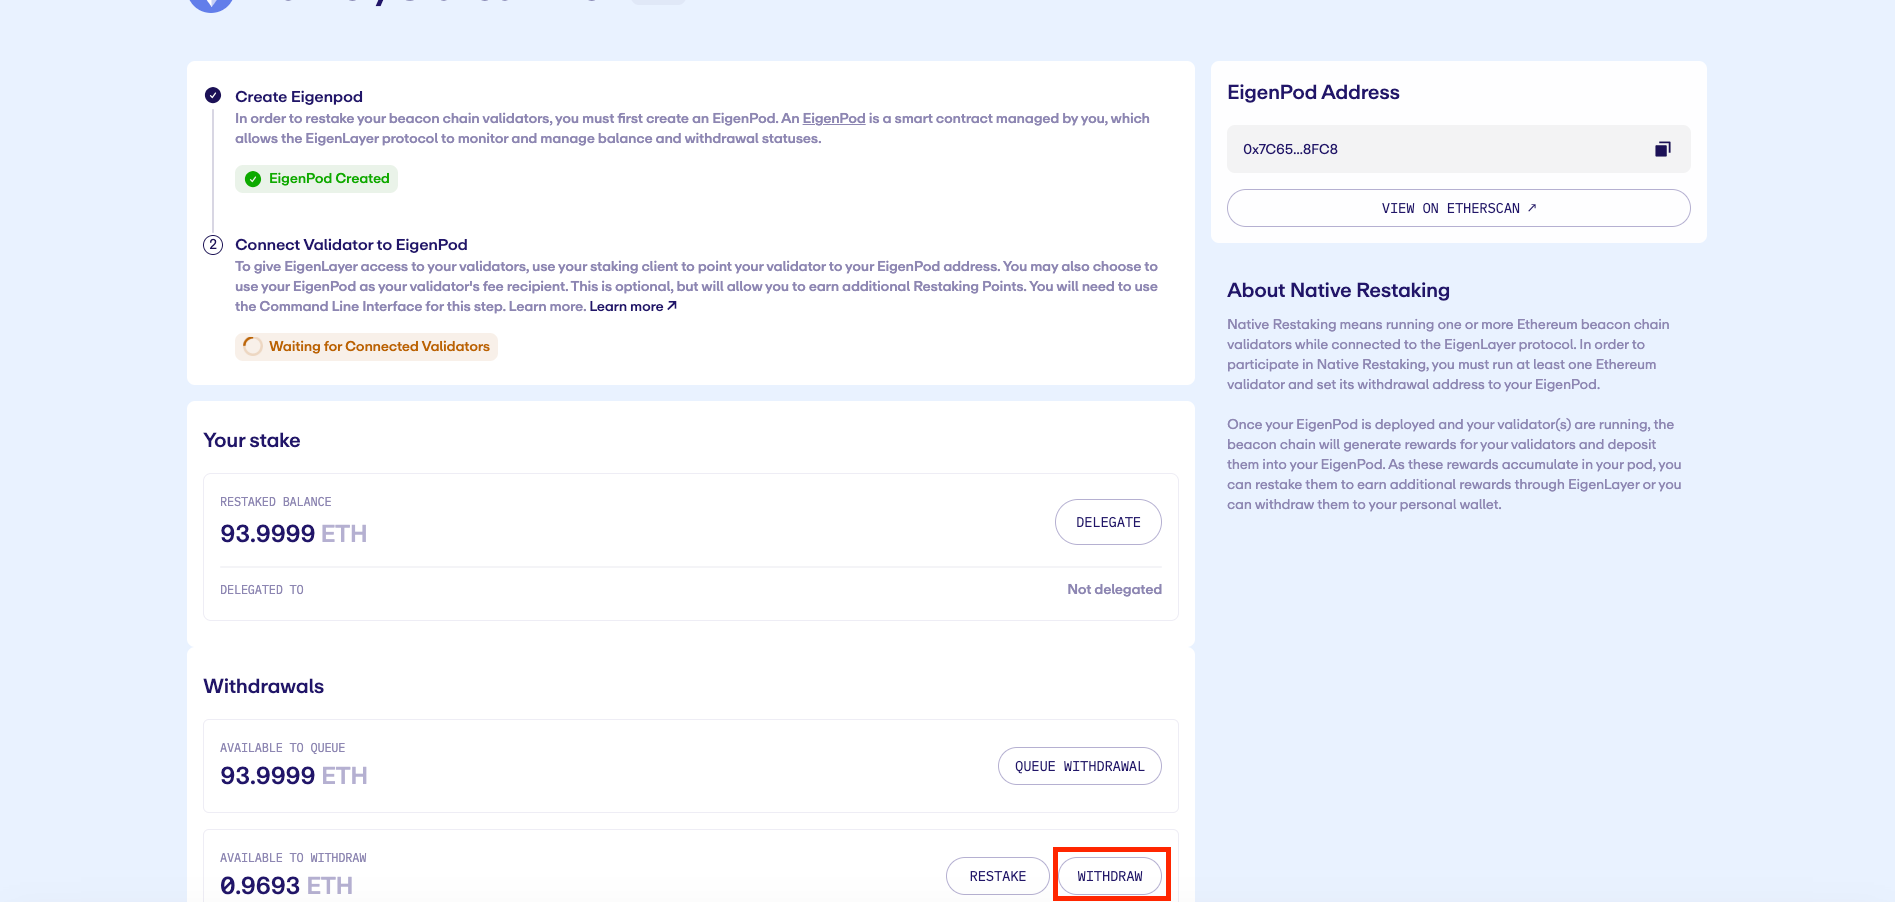
If successful, your funds will be deposited into your wallet. Check your wallet to verify the partial withdrawal has been received.
Try on Holesky testnet
To feel the staking flow before staking on mainnet, use the following link to test EigenLayer on Holesky.
- EigenLayer Holesky Testnet
- stakefish dashboard (switch network to Holesky)
EigenPod Upgrade Guide
If your EigenPod was created before Stage 2, you must upgrade your EigenPod per the steps in the following guide from EigenLayer.
When you reach the fee recipient warning step in the EigenPod Upgrade Guide, click "Continue."
You don't need to worry about it.
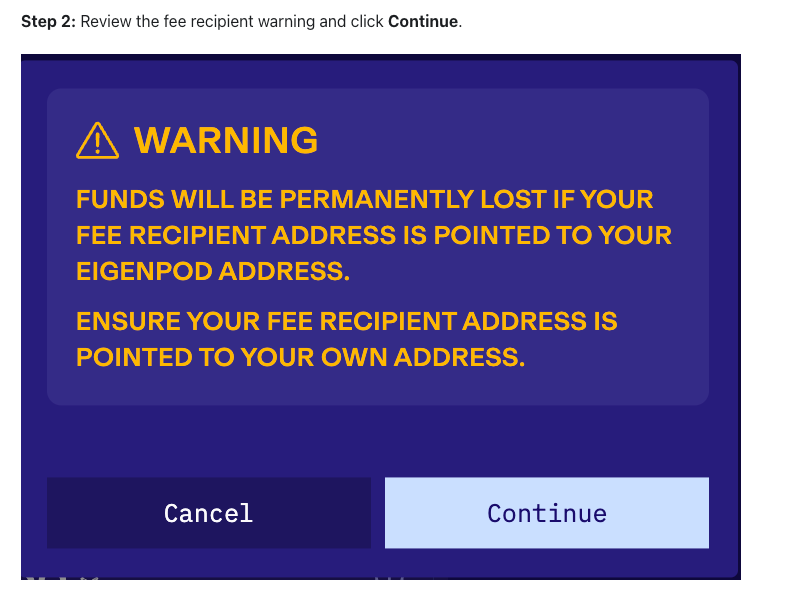
By fee recipient, they mean the wallet that will receive MEV/Tip rewards.
We set the fee recipient to our MEV/Tip smoothing pool. Stakers can collect MEV/Tip rewards from their Ethereum staking dashboard.
Stakers only need to set their withdrawal credentials to their EigenPod address when staking by going to advanced options on stake.fish.
For updates and special announcements, follow our Twitter (@stakefish 🐠) and join our community on Telegram.
About stakefish
stakefish is the leading validator for Proof of Stake blockchains. With support for 20+ networks, our mission is to secure and contribute to this exciting new ecosystem while enabling our users to stake confidently.
Visit our website 🐠 | Telegram | Twitter | Instagram | YouTube | LinkedIn | Reddit


